Title here
Summary here
If your users use virtual servers to send emails, mail servers may treat these emails as spam. In this topic, you’ll learn how to prevent this by enabling reverse DNS management in SolusVM.
Most mail servers use reverse DNS resolution to verify email domains and filter those that are likely to send spam. To do so, mail servers check for DNS PTR records. A PTR record, which is the reverse version of an A record, maps the IP address to the domain name. If the mail server detects no or an invalid PTR record, emails sent from the given IP address will land in spam.
Emails from your users’ domains are likely to be treated as spam because these domains don’t have PTR records by default. To give your users the ability to add PTR records and pass mail server checks, you need to enable reverse DNS management in SolusVM.
To enable reverse DNS management:
Get a server with PowerDNS installed.
Enable the PowerDNS API.
To do so, you will need to add the info about an API key to the pdns.conf file.
Copy the API key name because you’ll need it later.
Log in to SolusVM and go to Settings > DNS.
Select “PowerDNS” and then specify the hostname of your PowerDNS server and the API key name you copied during step 2. You can keep the Default reverse DNS record template, TTL, and Port fields filled in by default.
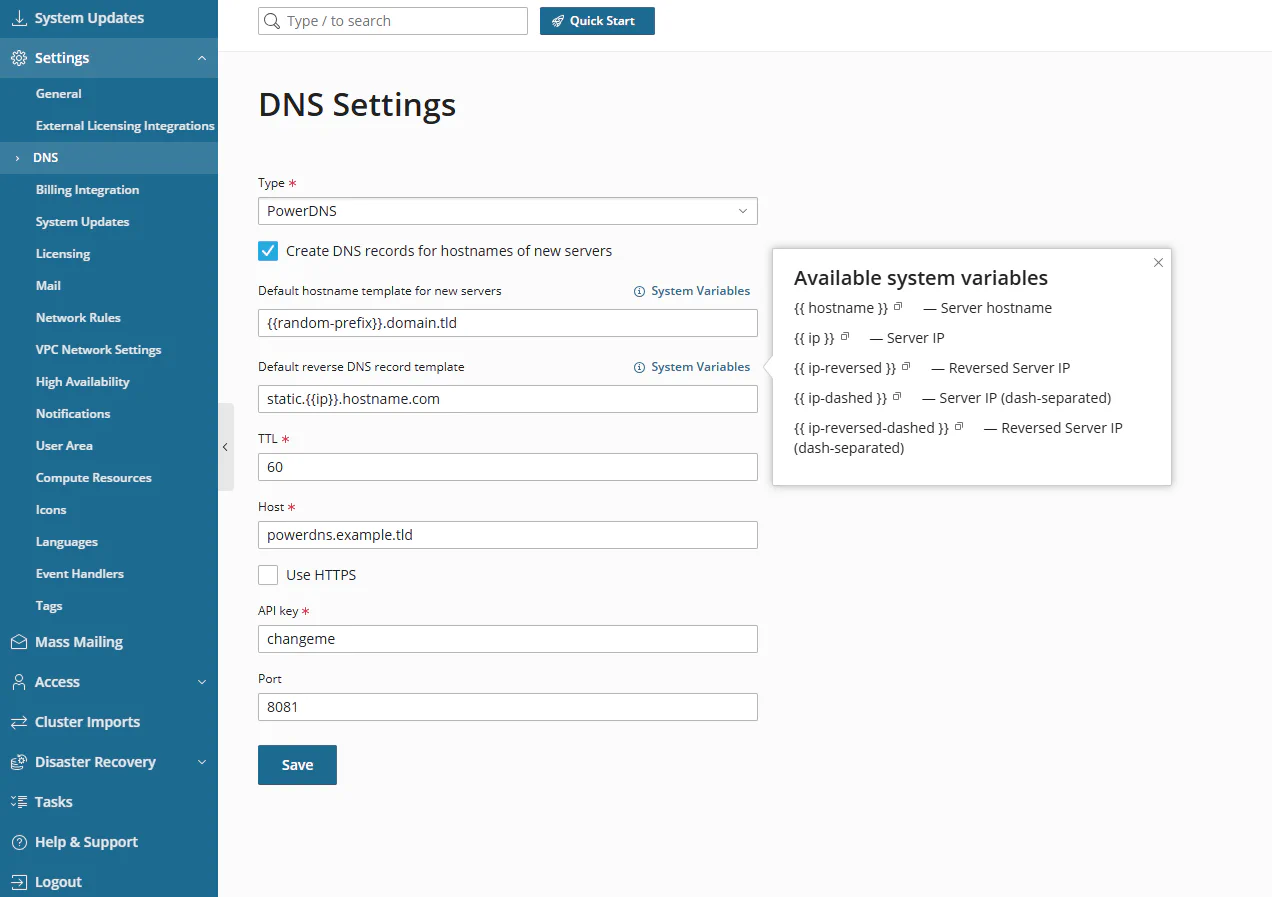
Once you fill in all the required fields, click Save.
Determine which IP block contains IP addresses of the servers whose users send mail. Contact your hosting provider that allocated you this IP block. Ask the provider if they can delegate the IP block to the DNS server of your choice (which is the PowerDNS server in our case) using a reverse DNS zone.
If the provider can delegate, give them PowerDNS name servers to delegate the reverse zone to. The provider will map the IP block to the reverse DNS zone.
Ask the provider for the reverse DNS zone name.
You’ll need it later. The name ends with in-addr.arpa for IPv4 or ip6.arpa for IPv6, for example, 168.192.in-addr.arpa.
Note:
If the provider cannot delegate the IP block, you cannot enable reverse DNS management unless you get an IP block from the provider that can delegate.
Manually create the reverse DNS zone you received from the provider (168.192.in-addr.arpa) in PowerDNS server.
In SolusVM, go to Network and add a new IP block or edit an existing one.
Select Enable reverse DNS management.
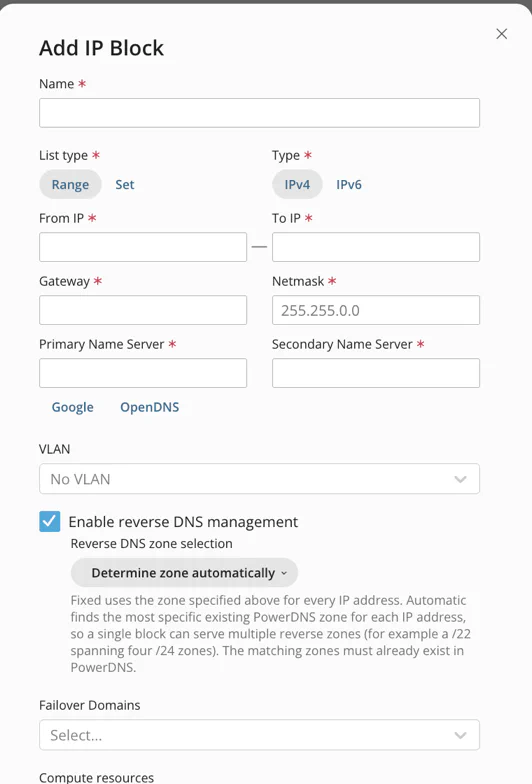
Under Reverse DNS zone selection, choose how SolusVM should determine which reverse DNS zone to write PTR records into:
168.192.in-addr.arpa), and optionally adjust the record name template (default {{fourth-octet}}). Every IP address in the block writes its PTR record into this single zone. This is the default for existing IP address blocks. Use it when the block is /24 or smaller and maps to exactly one delegated reverse zone.10.67.90.5 IP address in the 90.67.10.in-addr.arpa zone would receive 5 as its record name). SolusVM hides the manual zone and record-name template text boxes in this mode, so you don’t set them.Use auto mode for routed blocks larger than /24 (a /22 or /16 block, or an IPv6 block), since reverse DNS delegation happens per /24 (IPv4) or per nibble boundary, such as /64 (IPv6). A single manual zone entry can’t serve a block that spans multiple reverse zones. In auto mode, SolusVM resolves the right zone per IP address, so you don’t have to split the block.
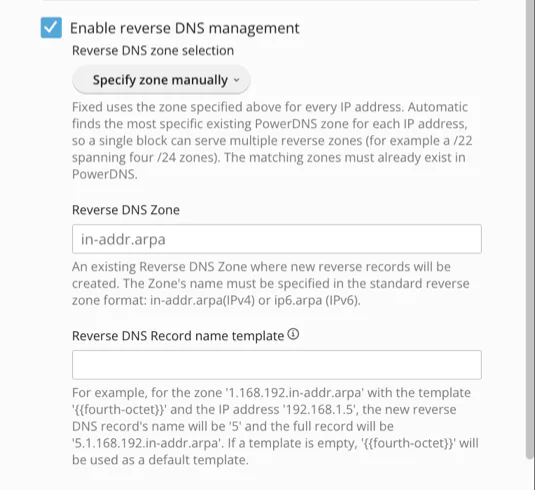
Click Save.
Note:
/24 (IPv4) or nibble-boundary (IPv6) zone the block could resolve to already exists in PowerDNS (see steps 6–7). If SolusVM can’t find a matching zone for a given IP address, PTR creation for that IP address fails with a no delegated reverse zone found error, and SolusVM writes nothing for that IP address.You’ve done your share of work by enabling reverse DNS management in SolusVM.
Now your users can add PTR records.
Note:
We call PTR records Reverse DNS entries in the SolusVM user interface.
To add a reverse DNS entry as a user:
Go to https://<management-server-hostname>/login or https://<management-server-IP>/login.
Under the desired project, click “… servers”, for example, “2 servers”.
Click the server name.
Go to the Networking tab and then click Add Reverse DNS entry.
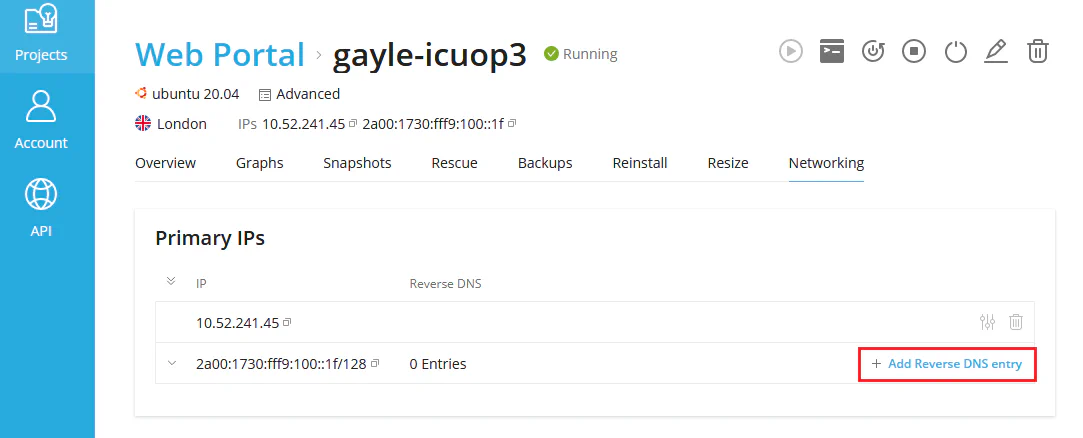
Specify the server IP address and the email domain.
Click Save.
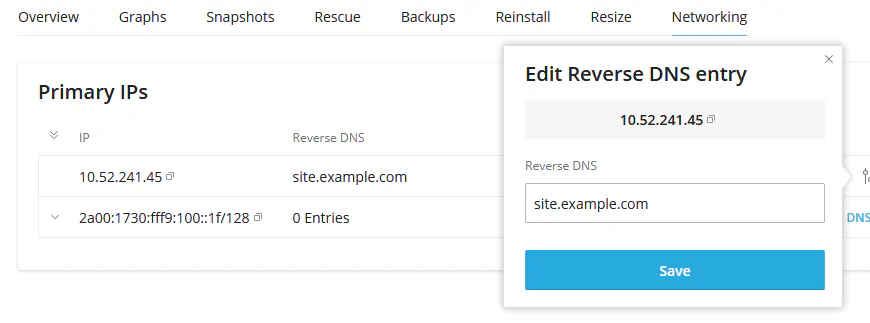
You’ve added the PTR record for the server. Emails sent from this server now have higher chances of reaching the inbox.
Note:
Users can add PTR records mapped to the main and additional IP addresses.
Reverse DNS management has the following limitations:
.0 and .255 in an IPv4 block)./24). If your provider delegates using RFC 2317, use fixed mode for that block.