Title here
Summary here
SolusVM is constantly adding new features, improvements, and bugfixes. To ensure that SolusVM is up to date, automatic installation of SolusVM updates is enabled by default. To stay safe and enjoy the latest features, we strongly recommend that you keep automatic updates enabled. Moreover, you can schedule when SolusVM updates are installed and choose the update type (mainline, stable, or testing).
You can see information about the current SolusVM version, available updates, and release notes, in System Updates.
To see notifications about available and installed updates, click the
![]() icon in the upper right corner of the screen.
icon in the upper right corner of the screen.
SolusVM updates are free of charge. They add new features, enhancements, and bugfixes, which update the following:
SolusVM automatically checks for updates every 15 minutes. During an update, the management server goes down and then restarts after the update. Unlike the management server, compute resources and servers do not have any downtime. Usually an update takes a couple of minutes. You can update SolusVM in a number of ways:
Note:
SolusVM updates are applied sequentially. You cannot install only a specific update or skip one of the updates.
SolusVM offers three types of updates you can choose from:
Note:
You receive notifications and see the info in System Updates only about the selected update type.
To select the SolusVM update type:
After you change the update type, SolusVM will be updated to the latest version according to the selected type (if automatic updates are enabled).
By default, SolusVM automatically checks for updates, downloads, and installs them on Saturday. You can set the desired weekdays and time when automatic updates are installed.
To set the desired weekdays and time when SolusVM auto-updates are installed:
To have more control over installing updates, you may want to turn off automatic updates and update SolusVM manually. In this case, you can decide whether to install an update and can install updates when it is convenient for you.
To update SolusVM manually via the interface:
Go to Settings > System Updates.
Under Update Method, select Manually, and then click Save.
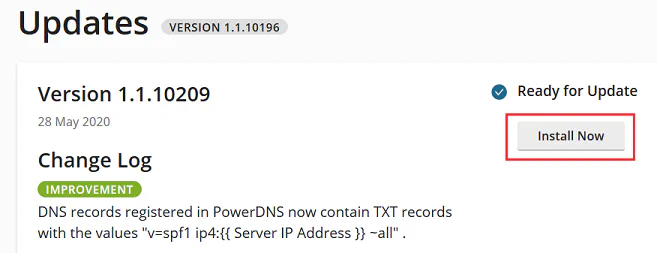
Regularly check for updates in System Updates and install an update by clicking Install Now.
You may want to update SolusVM manually via the CLI in the following cases:
You cannot update via the interface for any reason. For example, the management server is down.
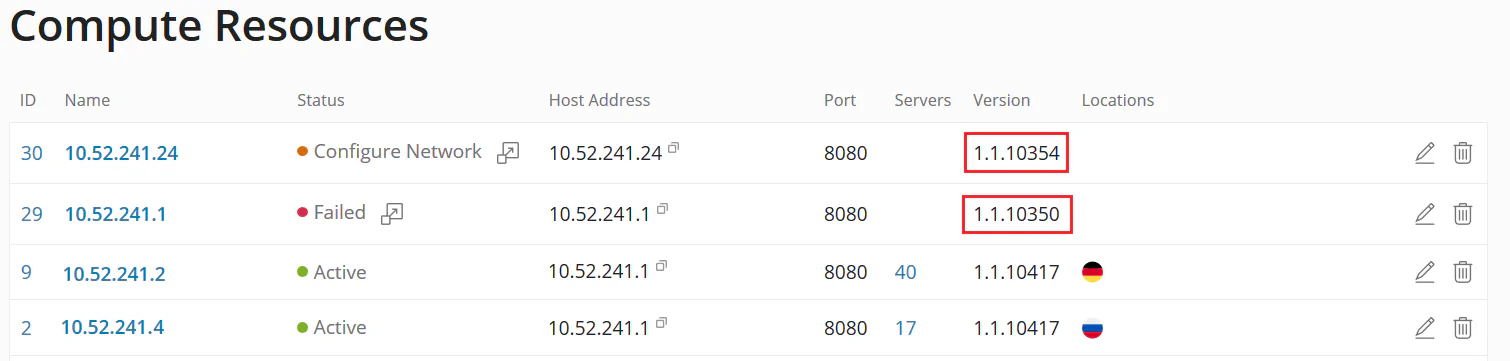
You updated SolusVM but one or more compute resources were not updated (see the screenshot below). You want to restart the update.
An update failed and you tried to restart the corresponding task in the interface but it did not help. You now want to try updating via the CLI.
You specifically want to update via the CLI and control the update process.
To update SolusVM manually via the CLI:
/usr/local/solus/config/config.yml and change the update type in channel, for example:
update_service: channel: mainline/usr/local/solus/bin/installer -update -to <version>
where <version> is the latest version of SolusVM. For example:
/usr/local/solus/bin/installer -update -to 1.2.3.4The update will start and you will see its progress in the terminal.
Even updates can have unexpected issues. For this reason, SolusVM backs up its database before each update. If anything goes wrong during or after the update, you can try troubleshooting by reverting to the previous SolusVM version. The management server will go down and then restart with the previous SolusVM version. Compute resources and servers do not have any downtime during reversal.
To revert to the previous SolusVM version via the CLI:
/usr/local/solus/bin/installer -revert -to <version>
where <version> is the previous version of SolusVM. For example:
/usr/local/solus/bin/installer -revert -to 1.2.3.3