Title here
Summary here
You can configure GPU selection as a customizable option for SolusVM products in WHMCS. This allows customers to choose a GPU when they order a virtual server:
The GPU option works together with two other configurable options. It determines which of them the customer sees:
| Option Name | Purpose |
|---|---|
GPU | The customer selects the type of GPU: no GPU, a vGPU profile, or a passthrough GPU. |
vGPU Profile | The list of vGPU profiles. For steps, see vGPU Profile. |
GPU Model | The list of passthrough GPUs. For steps, see GPU Model. |
SolusVM accepts a vGPU profile or a passthrough model, but it rejects a request that has both. The GPU option stops customers from ordering both.
Important:
SolusVM does not support changing a server’s GPU through WHMCS. SolusVM binds a GPU to the server when it creates the server, and it rejects a resize that would change the GPU. Customers can only select a GPU when they order the server for the first time, and WHMCS hides all three GPU options on the upgrade page.
Before you configure a GPU option, make certain that:
Note:
A GPU that shows Compatible in the Passthrough column on the compute resource’s GPUs tab can work in passthrough mode, but it does not always use that mode. To see a GPU’s current mode, check its Allocation mode.
To create the GPU option:
Log in to the WHMCS Admin Area.
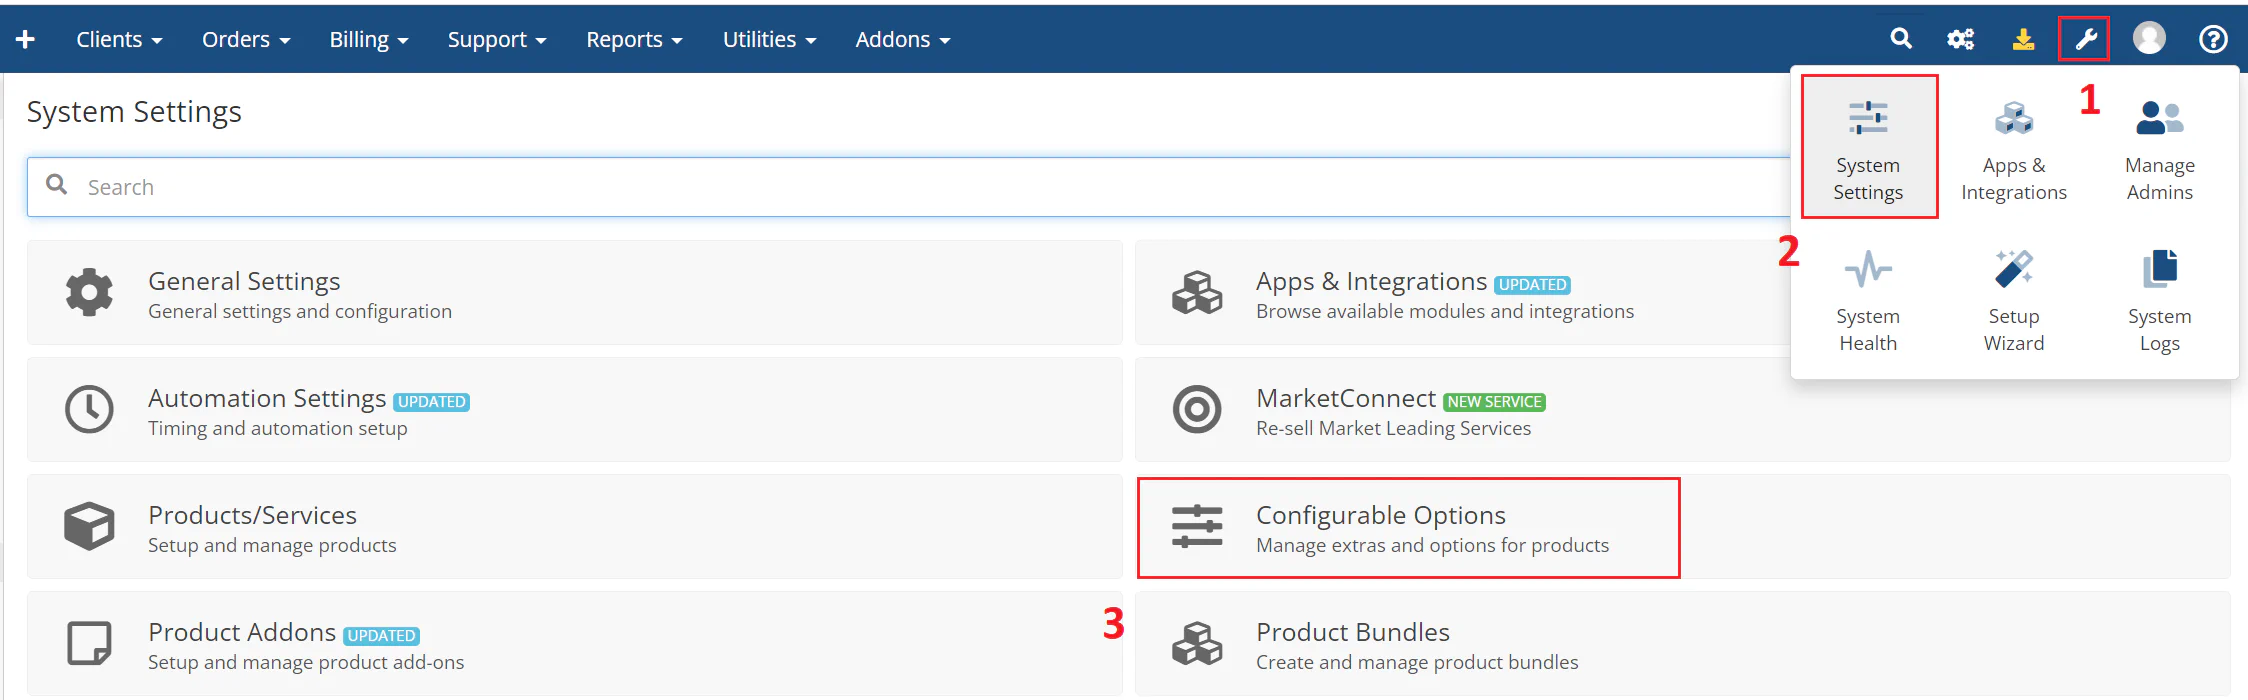
Go to Configuration > System Settings > Configurable Options:
Click Create a New Group or select an existing group.
Enter a group name and select the product to assign to the group.
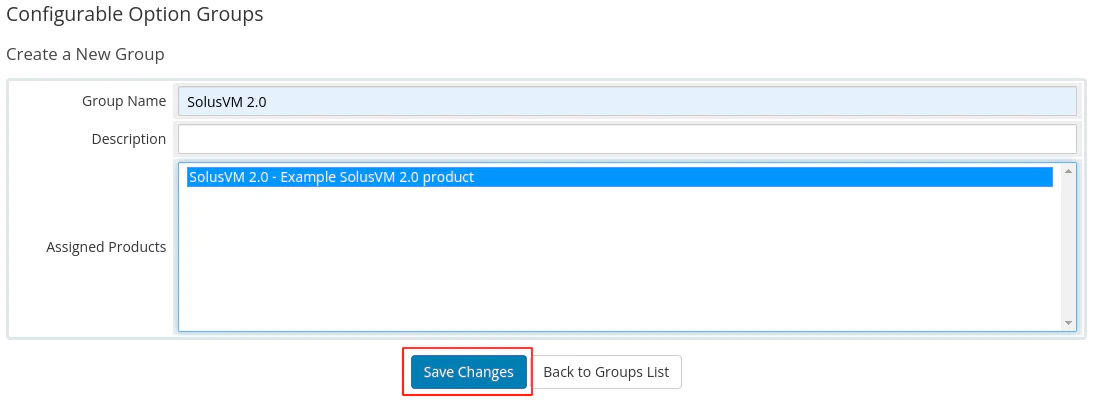
Click Save Changes.
Click Add New Configurable Option.
Enter GPU as the option name and select Dropdown as the option type.
Enter each of the following option values in the Add Option text box and click Save Changes after each one:
none|No GPU
vgpu|Shared GPU (vGPU)
passthrough|Dedicated GPU
Click Close Window.
Note:
When you create the GPU option, note the following:
none and passthrough values.vGPU Profile and GPU Model values, where the customer selects an actual GPU.none, vgpu, or passthrough. You can choose the display name after the pipe. If the module receives any other value, it refuses the order with the error Unknown "GPU" configurable option value "...". It does not create a server without a GPU.On the order form, the GPU dropdown displays with the matching list beside it:
vgpu value displays the vGPU Profile list and hides the GPU Model list.passthrough value displays the GPU Model list and hides the vGPU Profile list.none value hides both lists.After SolusVM creates the server, its page in the client area displays the selected GPU.
An existing product that only offers the vGPU Profile option continues to work unchanged, and its profile values stay as they are. To offer passthrough GPUs on such a product, create the GPU and GPU Model options. Then add 0|None as the first value of the existing vGPU Profile option.