Title here
Summary here
You can configure High Availability protection as a customizable option for SolusVM VPS products in WHMCS. This allows customers to enable High Availability when ordering.
Note:
The High Availability feature is available in SolusVM starting from version 2.0.0-43370 and in the WHMCS module solusvm2vps starting from version 1.0.62. Update SolusVM and the module to these versions or later to access this functionality.
To configure High Availability as a customizable option:
Log in to your WHMCS administrator web interface.
Navigate to System Settings > Configurable Options.
The following image shows the configurable options interface:
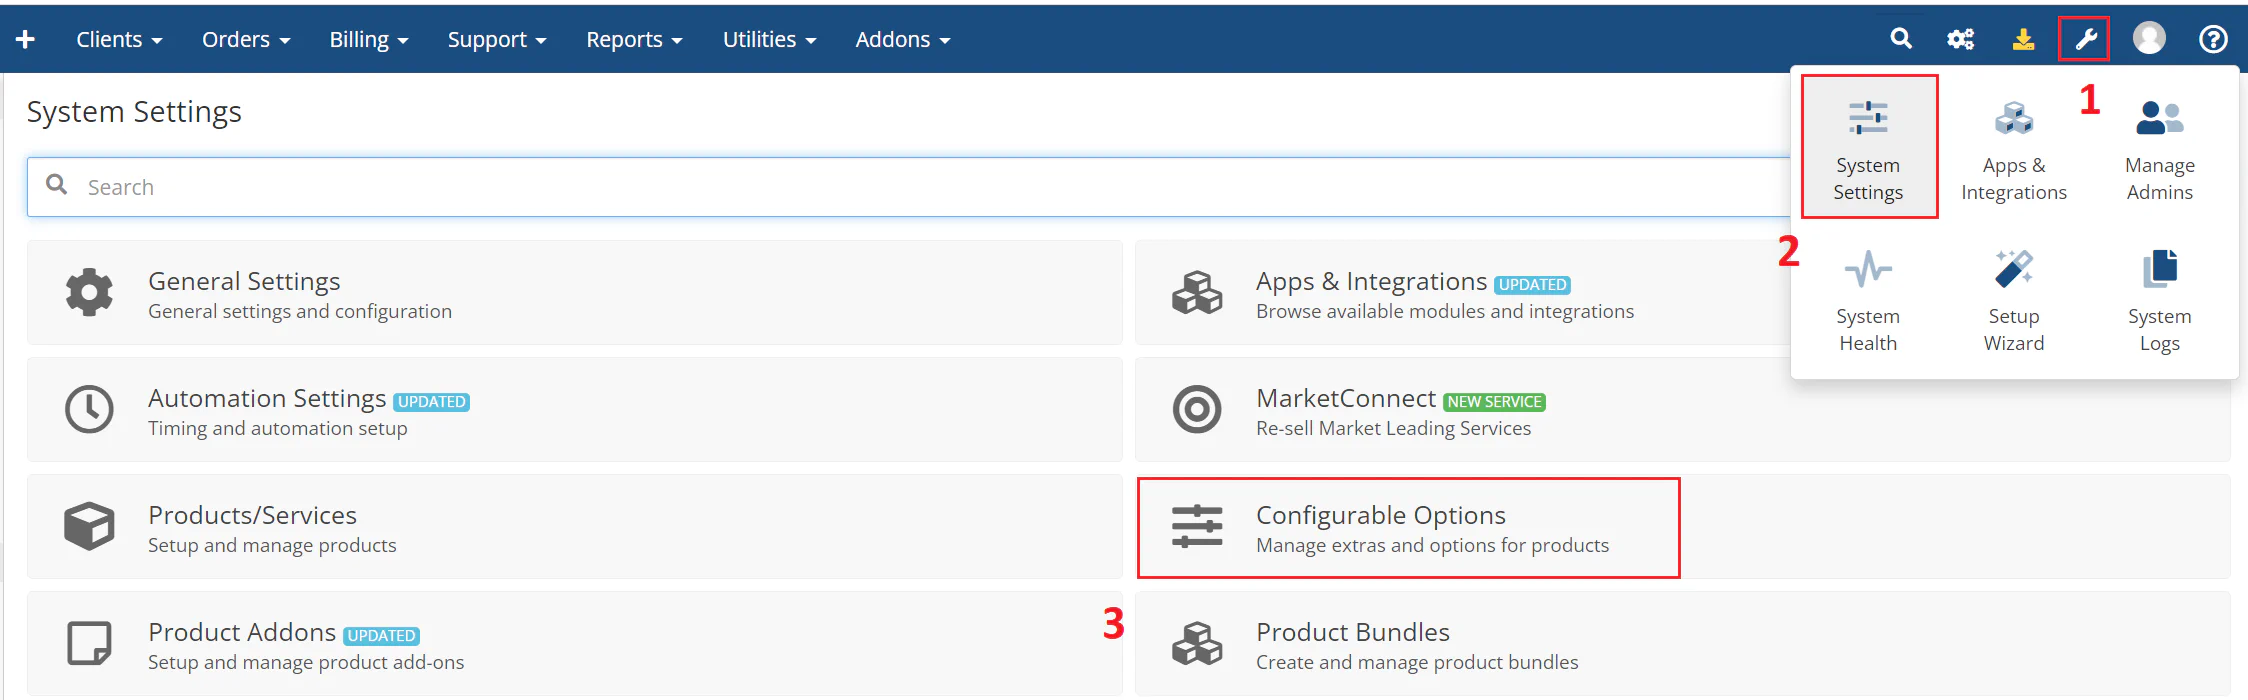
Click Create a New Group or select an existing group.
Note:
Keep the configurable option group for resource selection separate from other groups. You can use one configurable option group for several resources, but do not mix them with Operating System, Application, or Location.
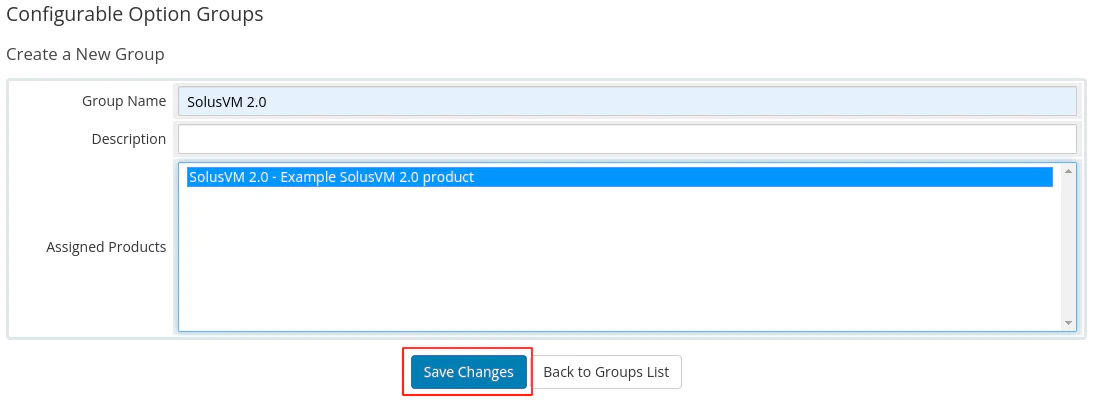
Enter a name for your group, select the product you created earlier to assign to the group, and then click Save Changes.
The following image shows the group configuration:
Click Add New Configurable Option.
The system opens a new browser window where you specify the option settings.
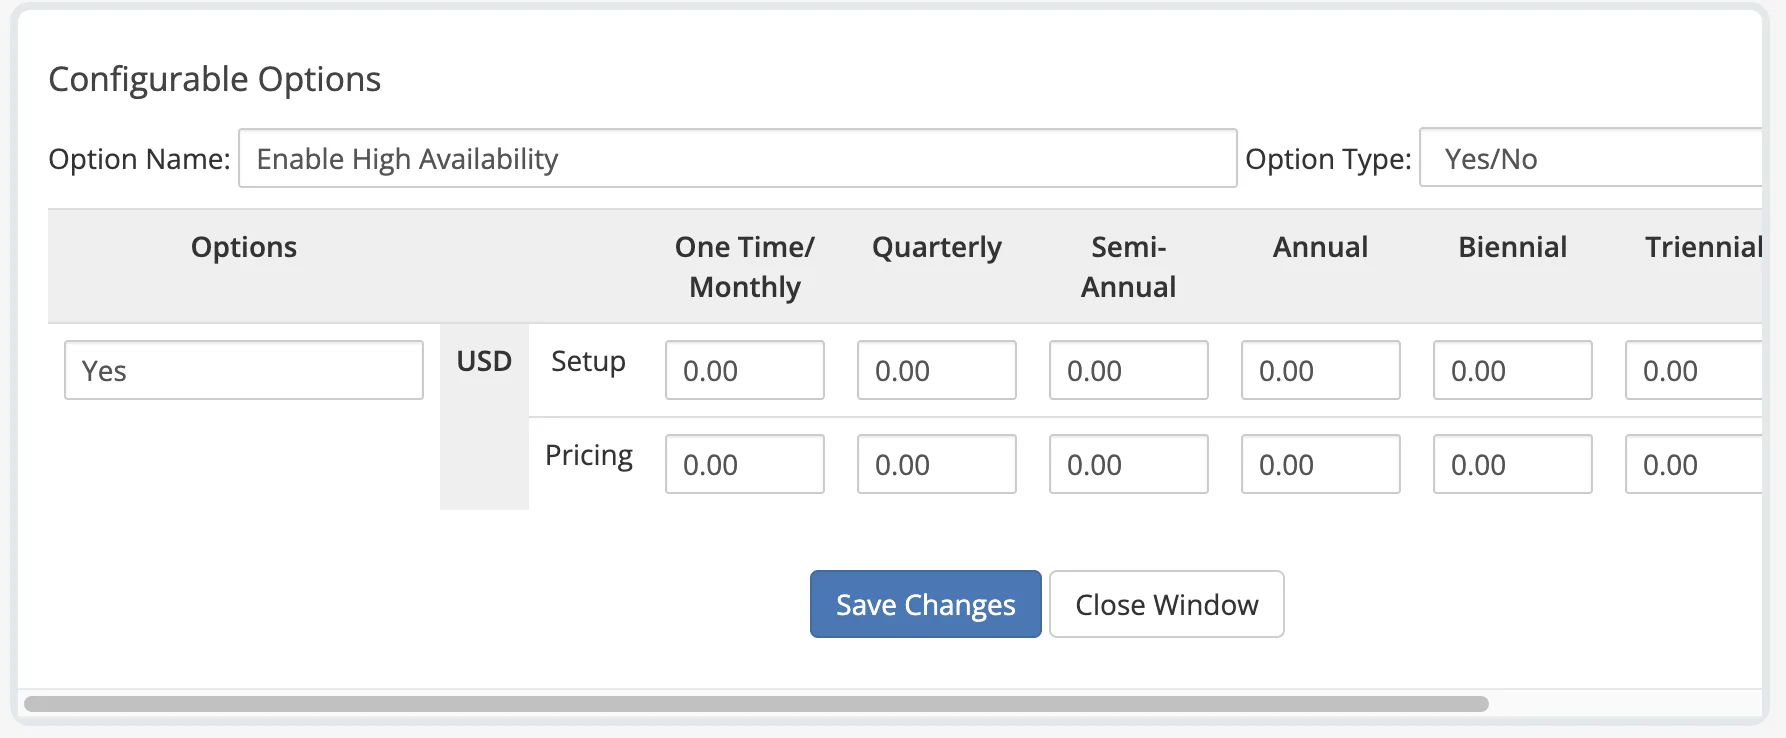
Enter Enable High Availability in the option name field and select Yes/No as the option type.
In the Add Option field, enter the option value Yes, and then click Save Changes.
Click Close Window.
The following image shows the High Availability configuration:
When customers choose your product, they can enable High Availability for SolusVM servers.
When a customer enables High Availability on an existing VPS through an upgrade, the WHMCS module automatically triggers a High Availability migration that moves the VM’s disks to the failover somain storage.
Before the system applies the upgrade, the customer sees the following confirmation message:
After enabling High Availability, the VM can be temporarily unavailable. Continue?
The migration process is fully automatic. SolusVM determines the action based on the current placement of the VM:
| Current placement of the VM | What SolusVM does |
|---|---|
| The compute resource is already in a failover domain, and the disks are on the failover domain storage. | Nothing to migrate. SolusVM enables High Availability immediately. |
| The compute resource is in a failover domain, but the disks are on local storage. | SolusVM moves the disks to the failover domain storage on the same compute resource, which is a local storage change. |
| The compute resource is not in a failover domain. | SolusVM migrates the VM to a compute resource that belongs to a failover domain, and places the disks on the failover domain storage. |
If the VM is running when the migration starts, SolusVM stops it first and then restarts it automatically after the migration completes. If a live migration attempt fails, SolusVM retries it as an offline migration.
When a customer disables High Availability through a downgrade, SolusVM turns it off on the VM without migrating anything.
You can also enable High Availability as a default product setting, without offering it as a configurable option.
To do so, in the WHMCS admin area, go to System Settings > Products/Services, click Edit for the product, open the Module Settings tab, and select the high_availability_enabled checkbox (configoption14).
When you enable this setting, every new VPS that you create with this product has High Availability enabled by default.