Title here
Summary here
Now that you have logged in to your SolusVM server, follow the steps below to complete setup.
To start any SolusVM setup, you need to install a SolusVM license first. SolusVM uses the same licensing and price model as SolusVM. Refer to the Pricing Guide for details.
To install a license:
You are now ready to set up SolusVM.
Compute resources connect hypervisors to the management physical server. Compute resources provide resources (CPU, RAM, and disk space) the customers consume to deploy their own isolated servers. The industry commonly refers to these as virtual private servers (VPSs). However, this guide uses the term “servers”.
Note:
The SolusVM term “compute resources” has a different meaning compared with a common one. By compute resources, we mean both actual compute resources (CPU and RAM) and also storage resources (disk space).
Servers that you want to connect as compute resources must meet the following requirements:
| Requirement | Minimum |
|---|---|
| RAM | Minimum 8 GB |
| Free disk space | Minimum 100 GB |
| Incoming connections allowed to ports | TCP 22 (SSH) TCP 8080 (Agent) TCP 7778 (VNC) |
| Operating System | CPU Architecture | |
|---|---|---|
| x86_64 | ARM (AArch64) | |
| AlmaLinux 9 | ✔ | ✔ |
| AlmaLinux 10 | ✔ | ✔ |
| Debian 12 | ✔ | ✔ |
| Debian 13 | ✔ | ✔ |
| RHEL 8 | ✔ | ✔ |
| RHEL 9 | ✔ | ✔ |
| RHEL 10 | ✔ | ✔ |
| Ubuntu 22.04 | ✔ | ✔ |
| Ubuntu 24.04 | ✔ | ✔ |
| Virtuozzo Hybrid Server/OpenVZ 7 | ✔ | |
Note:
At the current moment, keeping software components up-to-date is a responsibility of the system administrator. Pay attention that updating of Open vSwitch may break the network connectivity.
Warning:
For resiliency reasons, we do not recommend that you use the management server as a compute resource (even if it is technically possible).
To add a compute resource:
root as the SSH login and the root password.Note:
SolusVM uses the server’s credentials only once (while connecting the server as a compute resource) and does not store them anywhere.
Click Save.
SolusVM now checks if the server you are trying to connect as a compute resource meets the requirements. If the server does not support virtualization, you will see the following error message:

In this case, enable virtualization in the server BIOS settings. To do so, refer to the documentation of your processor manufacturer.
If the server passed the checks and SolusVM connected it as a compute resource, you will see the screen that suggests selecting a network interface and configuring network.
Select the network interface and click Configure Network.
Warning:
Changing network settings poses the risk of permanently losing network access to the server. Proceed only if you have one of the following:
Click OK to start network configuration.
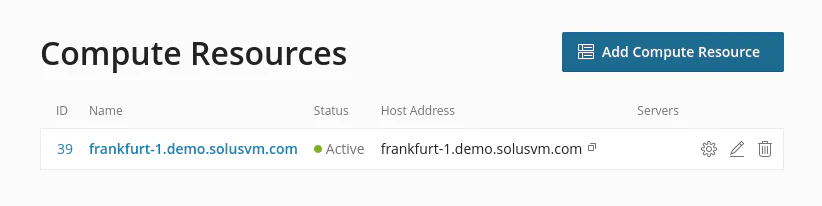
Once the network configuration finishes, you will see the connected server in the Compute Resources list.
Note:
By default, SolusVM creates compute resources that have the routed network type. If this type isn’t suitable for your network, you can change the compute resource’s network type to bridged in the Administrator Guide.
You are now ready to create a plan.
Plans serve as templates that define how SolusVM deploys servers. Plans preconfigure the amount of resources (CPU, RAM, and disk space) that SolusVM allocates to servers and define which storage type the compute resource uses.
To add a plan:
Go to Compute Resources > Plans and click Add Plan.
Give your plan a recognizable name.
Select a storage type:
There are various reasons why you may prefer one storage type over another. However, we recommend that you take the following considerations into account:
If you selected File Based or NFS during the previous step, select an image format: qcow2 or raw. With qcow2, you can enable snapshots.
Type a number of tokens. The tokens are units used to calculate and show the exact price for a plan for customers.
Specify the desired amount of virtual CPU, storage (HDD), and memory.
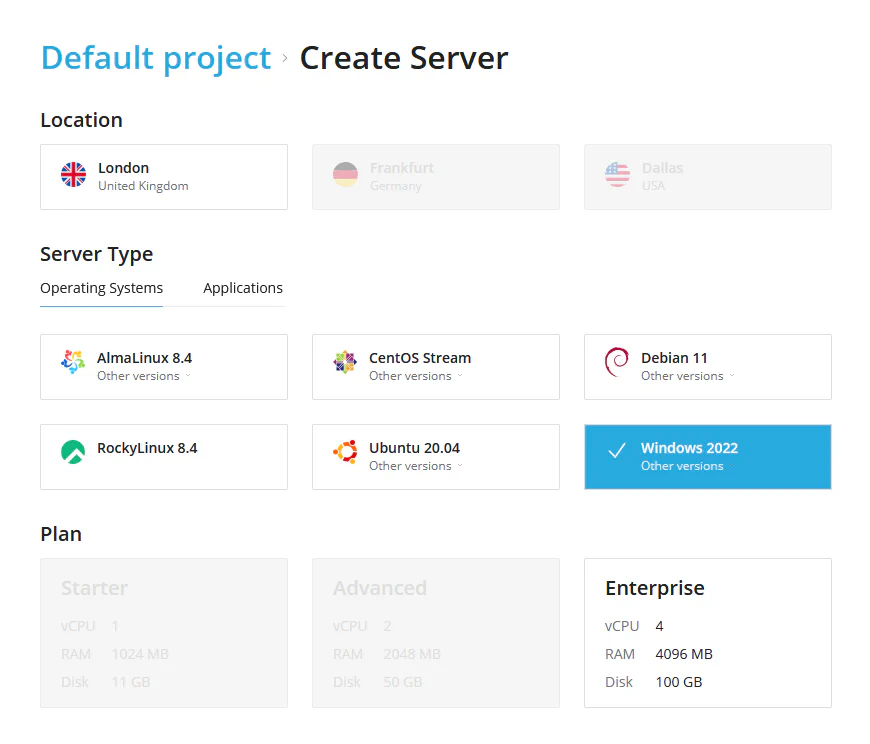
Locations, Operating Systems, and Application fields define for which locations, OS versions, and applications the plan can be used. Locations, Operating Systems, and Applications that are not bound with the plan will be visible but cannot be selected for new virtual server creation.

Filling Location, Operating Systems, and Application you can allow only desired combinations for new virtual server creation like on the following image, where Windows 2022 can be created only in the London location and only on the Enterprise plan.
Keep the plan visible.
(Optional) To prevent resources overuse, you can limit bandwidth and IOPS for each server created under the plan. To do so, click Change resource limits, click Limit, and then set the desired limits.
If you selected File Based with qcow2, ThinLVM, or NFS, you can turn on snapshots.
Click Save.

Each compute resource requires a storage point depending on a storage type:
A directory for File Based is just a normal directory, while a volume group and a thin pool are storage abstractions.
SolusVM can create a directory for the File Based storage type but you need to create other storage points yourself.
To add a storage point to a compute resource:
The procedure of creating a storage point depends on the storage type you have selected while creating the plan:
Log in to SolusVM and go to Compute Resources.
Click the name of the created compute resource, go to the Storage tab, and then click Add Storage.
Select a storage type that your created plan has.
Depending on your storage type:
(Optional) By default, the system uses the storage for balancing new servers according to the chosen balancing algorithm (random or round-robin in Settings > Compute Resources) if the Use for New Servers setting is turned on. Keep this setting on because you now have only one storage point. If later you have multiple storage points and one of them is overloaded compared to others, you can prevent new servers from being created in this storage point by turning off Use for New Servers.
Note:
If you share NFS storage between compute resources, you will not be able to turn off Use for New Servers on one particular compute resource. Currently, turning off Use for New Servers affects all compute resources that use the storage.
(Optional) Select a storage tag for your storage point.
Click Save.

IP block is a range of IP addresses from which each created server receives its IP address. Assigning an IP address turns a mere server partition into a real server.
An IP address identifies a server and allows it to communicate with other devices in the Internet, which is essential if the server hosts websites.
You can add either an IPv4 or an IPv6 block. An IPv6 block is more difficult to add. For this reason, the procedure of adding an IPv6 block is as a separate topic in the Administration guide.
Note:
By default, the system assigns only one IP address to each server.
To add an IPv4 block:
Get a range of IP addresses. Usually you buy IP addresses from data centers and hosting providers or allocate a range of IP addresses within your local network.
Go to Network and click Add IP Block.
Give your IP block a name.
Keep IPv4 selected.
Specify the following values:
Select one or more compute resources to assign the IP block to.
Click Save.

You have created the compute resource, the plan, the IP block, and the storage point. You are more than halfway through. You now need to create a location.
A location is a label that informs customers where a particular node is actually geographically placed. Usually customers want to choose a compute resource closest to their geographical location to decrease network latency. To give customers information about geographical locations of available nodes, you need to create locations and assign them to compute resources.
By default, SolusVM creates the Default location. You can edit it or add new locations.
To add a location:

You have added the location and assigned it to the compute resource.
To use the default location instead of creating a new one, assign the existing location to a compute resource.
To assign an existing location to a compute resource:
You are almost there! The last step left before customers are ready to create servers.
SolusVM can send automatic email notifications to your customers when
the system deploys their servers. These emails contain information that is necessary for connecting to the server command line via SSH: the IP address of a created server
and the root password.
To start sending out these email notifications, you need to get an SMTP server and then specify its settings in SolusVM.
To set up email notifications:
Get an SMTP server. You can use such email services as SendGrid, MailGun, Mailchimp, or others or set up your own mail server (for example, Postfix).
Log in to SolusVM and go to Settings > Mail.
Specify the following settings:
Select the Use TLS checkbox.
(Optional) To check if the specified SMTP settings are correct, you can send a test email. To do so, select the Send test email checkbox and type the desired email address.
Click Save.
Congratulations!
Everything is done from your side as the administrator. Customers are now ready to create their servers.
Let’s see how they do it.