Prepaid Billing
This topic will explain how to set up prepaid billing integration using the SolusVM 2.0 WHMCS VPS Provisioning module. Once prepaid billing integration is set up, customers receive the ability to place orders and receive SolusVM 2.0 servers.
Step 1 – Install the SolusVM 2.0 WHMCS VPS Provisioning module
- Download the latest version of SolusVM 2.0 WHMCS VPS Provisioning module.
- Access the WHMCS server via SSH.
- Extract the
solusvm2vpsdirectory from the ZIP archive you downloaded in step 1 to/whmcs_root/modules/.
Step 2 – Generate an API token
- Log in to SolusVM 2.0 under your administrator account.
- Go to Access > API Tokens tab and then click Generate API Token.
-
Give your API token a name, select your administrator email, and then click Generate.

-
Click Copy & Close to copy the token and save it in a secure place. You will need the token later. You won’t see it in SolusVM 2.0 anymore.
Step 3 – Add a server
- Log in to the WHMCS admin area.
-
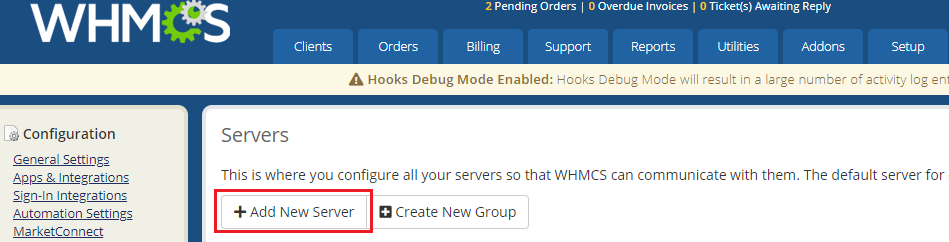
Go to Setup > Products/Services > Servers.

-
Click Add New Server.
-
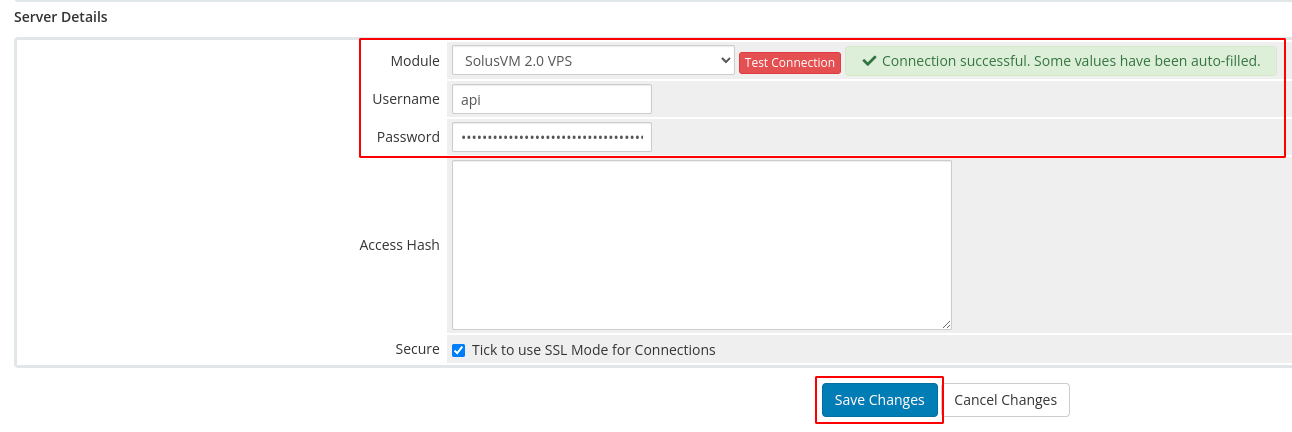
Specify the server settings and then click Test Connection:
- Under “Module”, select “SolusVM 2.0 VPS”.
- Specify the hostname or IP address of the SolusVM 2.0 management server.
- Keep the “Username” field empty or specify any username.
- In the “Password” field, paste the API token you generated earlier.
- Keep the “Access Hash” field empty.

If the server’s settings are correct and WHMCS can connect to the SolusVM 2.0 management server, you will see the following success message:

-
You will see the page that has three sections (“Add Server”, “Nameservers, and “Server Details”). You need to specify only certain settings in the “Add Server” section:
- In the “Name” field, specify your server name.
- In the “Hostname” field, specify the hostname or IP address of the SolusVM 2.0 management server.

-
Make sure that the settings in the “Server Details” section have been already auto-filled and then click Save Changes.
You’ve added a server.
Step 4 – Create a server group
-
Click
Create New Group.
-
Specify the server group settings and then click Save Changes:
- Give your server group a name.
- Keep the “Add to the least full server” option.
- In the “Selected Servers” box, add the server you created earlier.

You’ve created a server group.
Step 5 – Create a product group
-
Go to Setup > Products/Services > Products/Services.

-
Click Create a New Group.

-
Specify the group settings and then click Save Changes:
- Specify the product group name. It’s the name that will be displayed for the group to you and your customers.
- Select the order form template. It defines the design customers see when they want to place an order.
- Keep the “PayPal Basic” checkbox selected.
Note
There are other optional settings you can specify. Learn more about product group optional settings.

You’ve created a product group.
Step 6 – Create a product
-
Click Create a New Product.

-
Specify the product settings and then click Continue:
- Select the “Server/VPS” product type.
- Under “Product Group”, select the product group you created earlier (“SolusVM 2.0” in our example).
- Give your product a name.
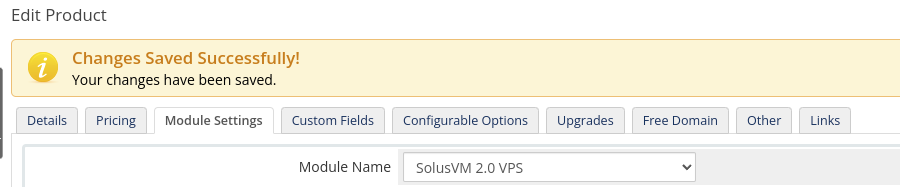
- Under “Module”, select “SolusVM 2.0 VPS”.
- Turn off “Create as Hidden” to make the product visible to your customers.

-
Go to the “Module Settings” tab and select the module settings:
- Under “Server Group”, select the server group you created earlier.
- Under “Plan”, “Default Location”, and “Default Operating System”, select the SolusVM 2.0 plan, location, and operating system correspondingly. When customers choose your product, they will get a SolusVM 2.0 server with the plan, location, and operating system that you’ve selected.
Note
If you want your customers to select plans, locations, and/or operating systems they want (among those created on the SolusVM 2.0 management server), create corresponding configurable options.
- (Optional) You can preconfigure servers created for customers. For example, you can create additional users or user groups in the system, run the desired commands at the first boot, and so on. To do so, fill in the “User Data” textbox. For reference, see cloud config examples.
- Select how and when WHMCS will set up the product once customers order it. We recommend that you keep the “Do not automatically setup this product” option. Learn more about other options in the WHMCS documentation, the “Module Settings” section.

-
Once you’ve selected the necessary settings, click Save Changes.
You’ve created a product.
Congratulations! At this point, you’ve finished configuring SolusVM 2.0 WHMCS VPS Provisioning module. Your customers can now create SolusVM 2.0 servers in WHMCS.
However, customers will get servers with the plan, location, and operating system that you’ve selected for them. To give customers the ability to select the server settings (among those created on the SolusVM 2.0 management server), create corresponding configurable options.
We’ll show you how to create a configurable option based on the example of operating systems. You create configurable options for locations and plans in a similar way. See more information on creating configurable options.
(Optional) Step 7 – Create a configurable option
-
Go to Setup > Products/Services > Configurable Options.

-
Click Create a New Group.
-
Give your group a name, select the product (the one you created earlier) to assign to the group, and then click Save Changes.

-
Click Add New Configurable Option. This will open a new browser window where you’ll specify the option settings.
- Give your option a name and select the option type (“Operating System” and “Dropdown” in our example).
-
In the “Add Option” field, specify the option value following the pattern:
OS_ID|OS_Nameand then click Save Changes. In the mentioned pattern:OS_IDis the actual ID of an OS image on the SolusVM 2.0 management server. To seeOS_ID,go to SolusVM 2.0 (the admin area) > Images > Operating Systems and locate the IDs of the operating systems you want to add as a configurable option.OS_Nameis the OS name to be displayed in WHMCS.

In our example, we’re adding CentOS 8 (
OS_ID 2) and Ubuntu 20.04 (OS_ID 7) as a configurable option.
-
Repeat the previous step as many times as many operating systems you want to offer. Once finished, click Close Window

You’ve added a configurable option. Now, when customers choose your product, they will have a choice of operating systems for SolusVM 2.0 servers.

Besides, you can add configurable option for applications in a similar way:
- Create a New Group or use an existing one.
- Click Add New Configurable Option. This will open a new browser window where you’ll specify the option settings.
- Give your option a name and select the option type (“Application” and “Dropdown” in our example).
-
In the “Add Option” field, specify the option value following the pattern:
APPLICATION_ID|APPLICATION_Nameand then click Save Changes. In the mentioned pattern:APPLICATION_IDis the actual ID of an Application on the SolusVM 2.0 management server. To seeAPPLICATION_ID,go to SolusVM 2.0 (the admin area) > Images > Applications and locate the IDs of the applications you want to add as a configurable option.APPLICATION_Nameis the application to be displayed in WHMCS.

In our example, we’re adding WordPress on Plesk (APPLICATION_ID 1) and NGINX (APPLICATION_ID 7) as a configurable option.
-
Repeat the previous step as many times as many applications you want to offer. Once finished, click Close Window

You’ve added a configurable option. Now, when customers choose your product, they will have a choice of applications for SolusVM 2.0 servers.