Title here
Summary here
The SolusVM Integration provides the connection between WHMCS and the SolusVM Virtual Infrastructure Management Platform.
This integration supports three billing methods:
For more information, see WHMCS Post-Pay Billing page.
| Addon Name | Latest Release | Current Version | Compatible With | Included in WHMCS |
| SolusVM | N/A | N/A | WHMCS 7.8 and later | No |
You need to download and upload the module before you can activate the addon through the Admin Area.
To activate the module:
solusvm2 directory to the /modules/addons folder of your WHMCS installation.You can access the SolusVM module within WHMCS by navigating to Configuration > System Settings > Addon Modules or, prior to WHMCS 8.0, Setup > Addon Modules within the WHMCS admin area.
When you access the SolusVM module for the first time, you will see the following screen.
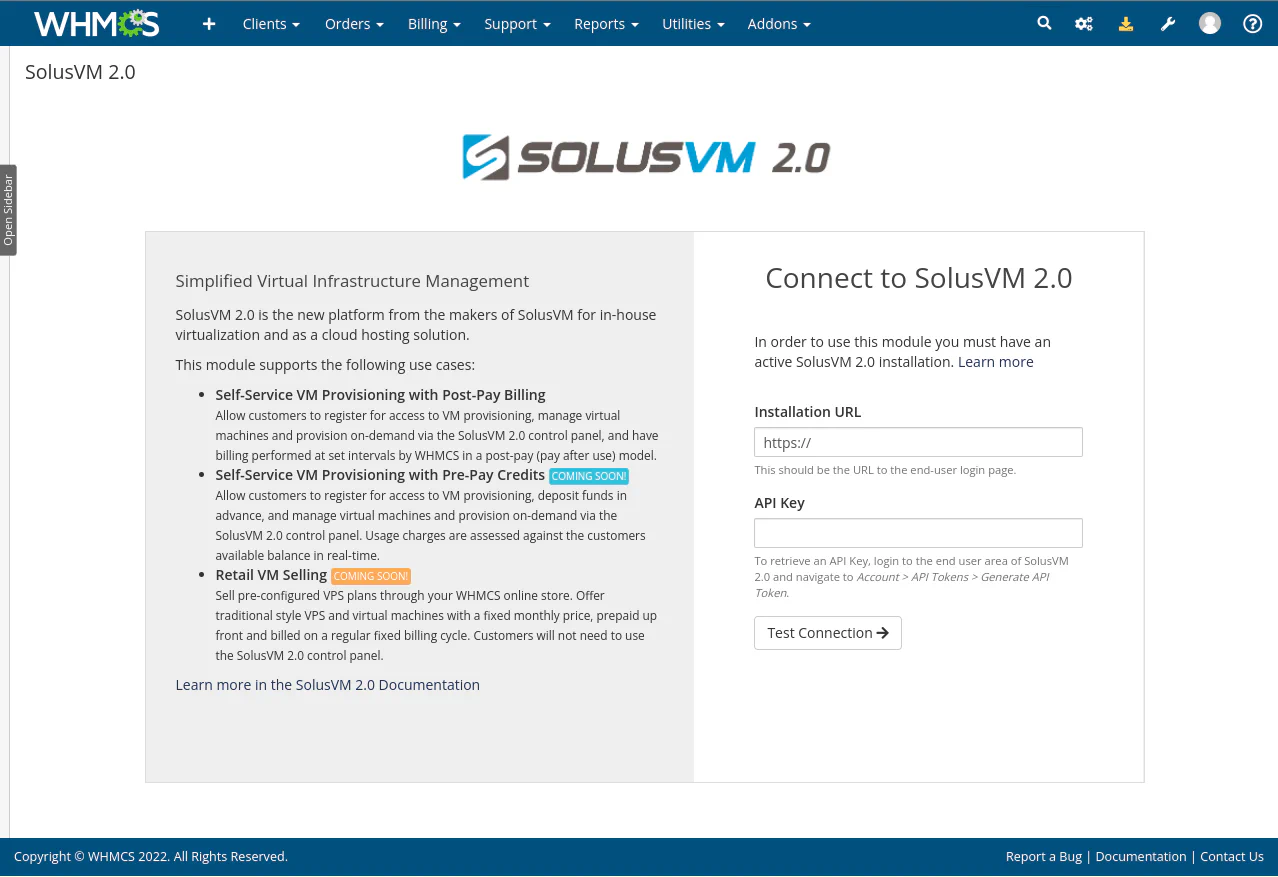
Enter the URL to your SolusVM installation. This should be the URL you use to access the web interface.
Enter your API Key. You can retrieve this by navigating to Account > API Tokens > Generate API Token when logged into the SolusVM user area.
Click Test Connection to verify that a connection can be established with the SolusVM system.
Upon success, the system redirects you to the management screen.
When you access the SolusVM module after connecting to SolusVM, you will see the following screen, which allows you to configure settings related to Post-Pay billing.
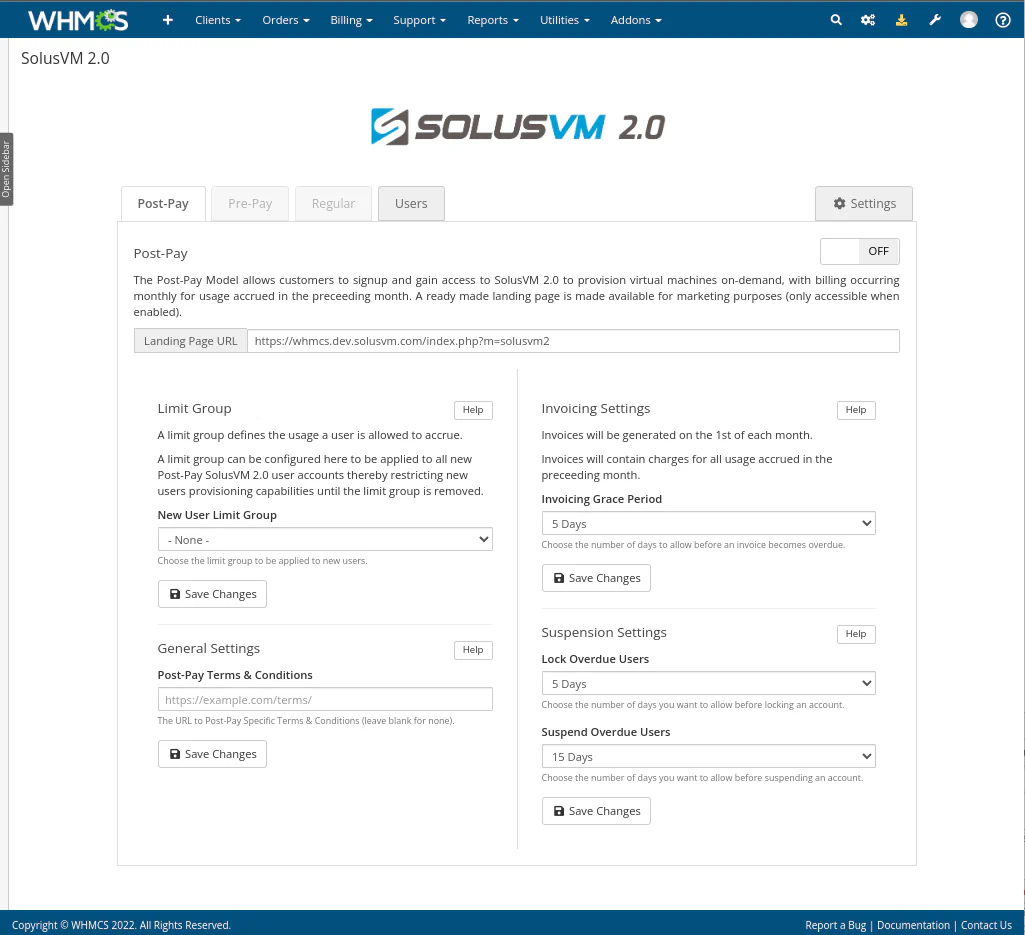
The WHMCS SolusVM Post-Pay functionality comes with a ready-made landing page designed to make it quick and easy to start offering SolusVM services. The link is provided here for convenience. This page can only be accessed when Post-Pay billing is enabled.
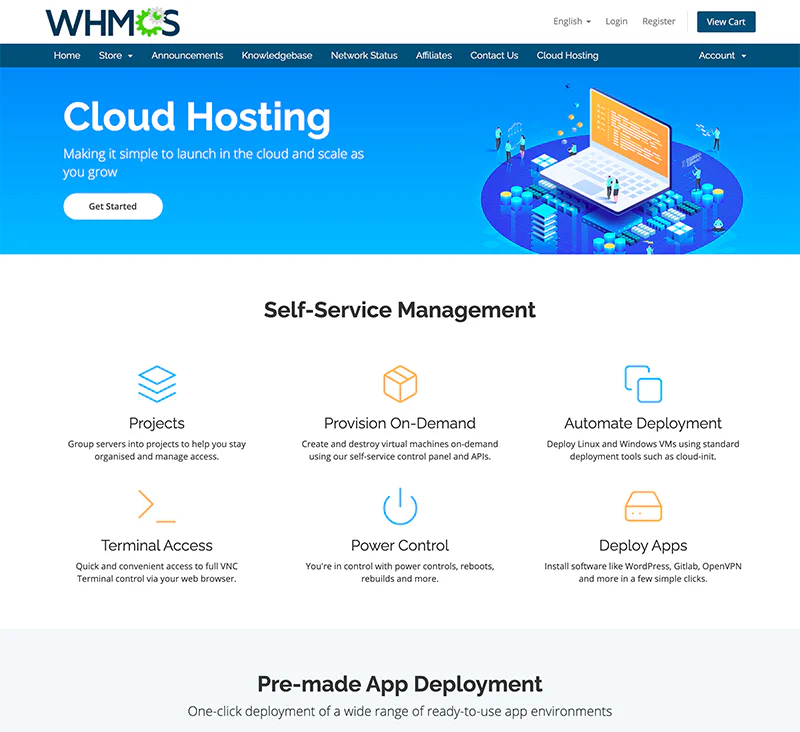
The system automatically adds menu items to the WHMCS client area when enabled. For logged out users, access the page via a Cloud Hosting option in the main menu. For logged in users, access it via a Cloud Hosting menu option under the Website & Security dropdown menu.
The landing page uses templates and can be customized. To make changes, copy the file /modules/addons/solusvm2/templates/post-pay/landing-page.tpl into the active WHMCS client area template directory under the path /templates/{active_template}/modules/addons/solusvm2/post-pay/landing-page.tpl. All paths are relative to the WHMCS root installation directory. From there, you can make changes to the template within your WHMCS client area template directory and these customizations will be preserved during module updates.
The limit group settings allow you to control settings related to limits imposed on new Post-Pay enabled users.
| Setting Name | Description |
| New User Limit Group | Select the limit group you wish to be applied by default to all new Post-Pay users. (* Limit groups must be created and defined within the SolusVM control panel) |
The general settings allow you to control general settings.
| Setting Name | Description |
| Post-Pay Terms & Conditions | An optional URL to Terms & Conditions for the Post-Pay billing service for SolusVM. Use this to provide additional terms relating to the invoicing and payment of Post-Pay service usage. |
The invoicing settings allow you to control settings related to invoices generated for Post-Pay usage.
| Setting Name | Description |
| Invoicing Grace Period | The number of days you want to allow after generation before an invoice is considered overdue. |
The suspension settings allow you to control settings related to service restrictions for non-payment of Post-Pay usage.
| Setting Name | Description |
| Lock Overdue Users | The number of days you want to allow before locking a user account in SolusVM. This is the number of days from the due date. |
| Suspend Overdue Users | The number of days you want to allow before suspending a user account in SolusVM. This is the number of days from the due date. |
For more information regarding locking and suspension restrictions, see the SolusVM documentation.
The Settings tab allows you to modify connection and pricing settings.
You must set token pricing for each active currency within WHMCS.
You can set token pricing up to four decimal places.
The prices entered should be the monetary cost in each given currency for one unit of token usage.
The API Connection panel allows you to modify and update the Installation URL and API Key at any time.
To make a change, enter both the Installation URL and an API Key and click the Test Connection button to validate the inputs.
If the connection is successful, WHMCS updates the URL and API Key.
Within the SolusVM product, you can configure billing integration settings.
The billing integration allows SolusVM to retrieve token pricing information and perform single sign-on to the WHMCS billing portal.
WHMCS automatically configures the WHMCS billing integration values every time you establish a successful connection between the WHMCS SolusVM module and a SolusVM target instance. You cannot generate and set these values manually.
If you need to reconfigure or reset the connection, re-establish the API connection with the SolusVM target instance using the API Connection panel located within the Settings tab of the SolusVM WHMCS integration module.