Title here
Summary here
In SolusVM, you and your customers can run virtual servers on custom operating systems booted from ISO images. In this topic, you will learn how to do the following:
SolusVM includes a wide range of built-in operating systems customers can choose from, namely: CentOS, Debian, Ubuntu, and so on. You can see all of them in Images > Operating Systems.
However, you can create custom ISO images that contain operating systems of your choice and offer these images to customers. Your customers can also create their own ISO images if you grant them the corresponding permission.
Note:
Unlike virtual servers running on built-on operating systems, those booted from ISO images are not ready for use out of the box. Customers need to manually install the operating system from the ISO image, configure the network, and install the guest tools.
By adding ISO images, you can attract the following customers:
To create an ISO image:
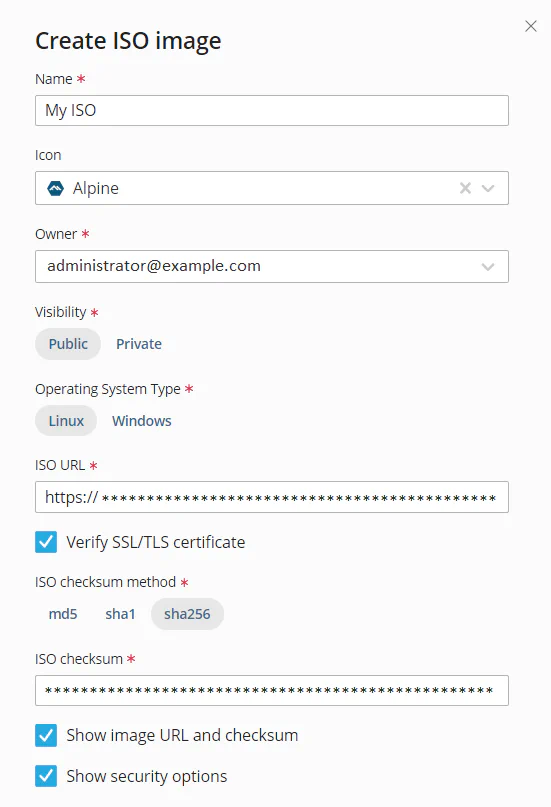
Go to Images > ISO images, and then click Add ISO image.
Give your image a recognizable name.
Select the icon corresponding to the operating system your image is based on.
Select the ISO image visibility: public or private:
Select the ISO owner:
public at the previous step, keep your email selected.private, select the email of the customer who will be the ISO owner.Select the operating system type your OS image is based on: Linux or Windows.
Paste the ISO image URL.
To have SolusVM check if the connection to the ISO image URL is secured with a valid SSL/TLS certificate, select the Verify SSL/TLS certificate checkbox.
It is important to make sure that the ISO image is not corrupted.
To check the ISO image integrity and authenticity, provide the ISO image checksum and checksum method. SolusVM will automatically verify its checksum.
For customers, who are particularly concerned about the transparency and security of the ISO image, we recommend that you keep the Show image URL and checksum and Show security options checkboxes selected.
In this case, customers who have the permission to manage their own ISO images will see the ISO image URL and checksum and their security status (verified or not). See the example screenshot below.
Click Save.
You’ve created the ISO image. However, customers can neither see nor use it unless you grant them the corresponding permissions.
There are a number of permissions related to ISO images. The Client role doesn’t have these permissions enabled by default, and you cannot edit the role because it’s built-in.
You will need to create a new role with a set of permissions related to ISO images, and then assign this role to one or multiple users.
To grant users permissions to see, boot from, and manage private ISO images:
Go to Access > Roles, and then click Add Role.
Give the role a recognizable name.
To grant users permissions to see and boot from ISO images, select get ISO images and boot from ISO images. If you also select manage owned ISO images, users will be able to see all public and their own private ISO images (the ISO images section appears on the left), and create, edit, and delete their own private ISO images.
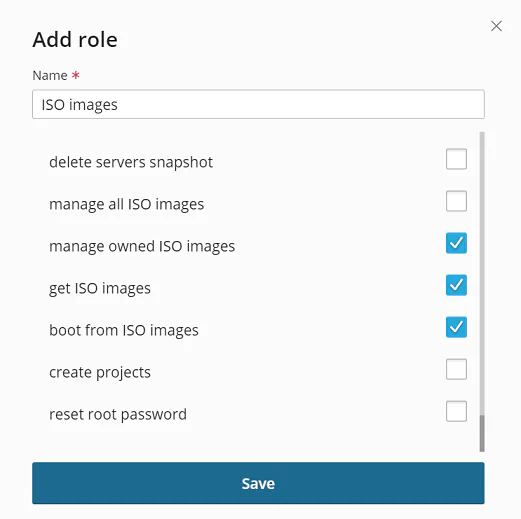
Click Save.
Go to Access > Users.
Click the
![]() icon next to the user you want to grant the new role to.
icon next to the user you want to grant the new role to.
Under Role, keep the default client role, and then select the new role you have created.
Click Save.
The user now has the permissions they need to run a virtual server on an operating system from the ISO image. Learn more about creating and using roles and permissions.
By default, users don’t have any limits related to ISO images. However, you can create a limit group with the following limits, and then assign it to users:
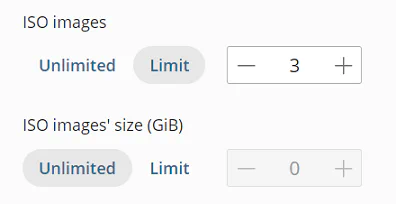
Learn more about setting limits and creating limit groups.
When users run a virtual server on a built-in operating system, the server is ready for use out of the box. Running a virtual server on an operating system from an ISO image requires additional setup.
To run a virtual server on an operating system from the ISO image:
Note:
At this step, you can choose any operating system for you virtual server. Later the server will run on the operating system from the ISO image.
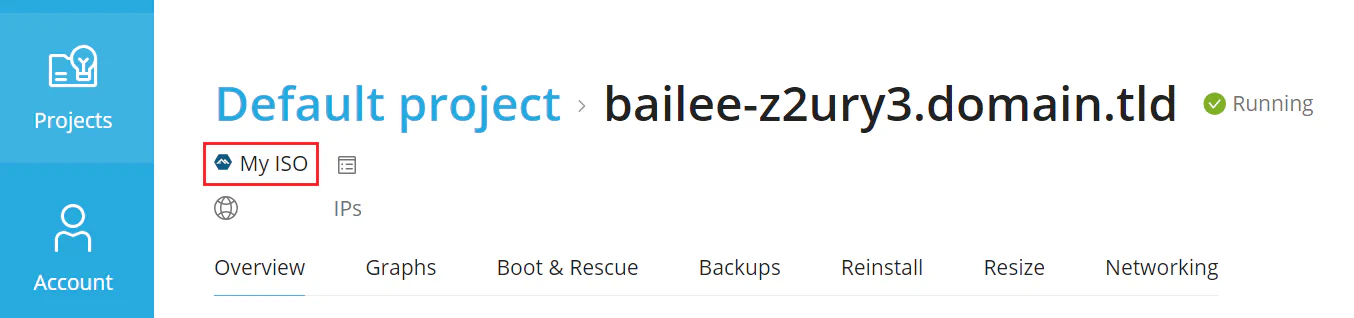
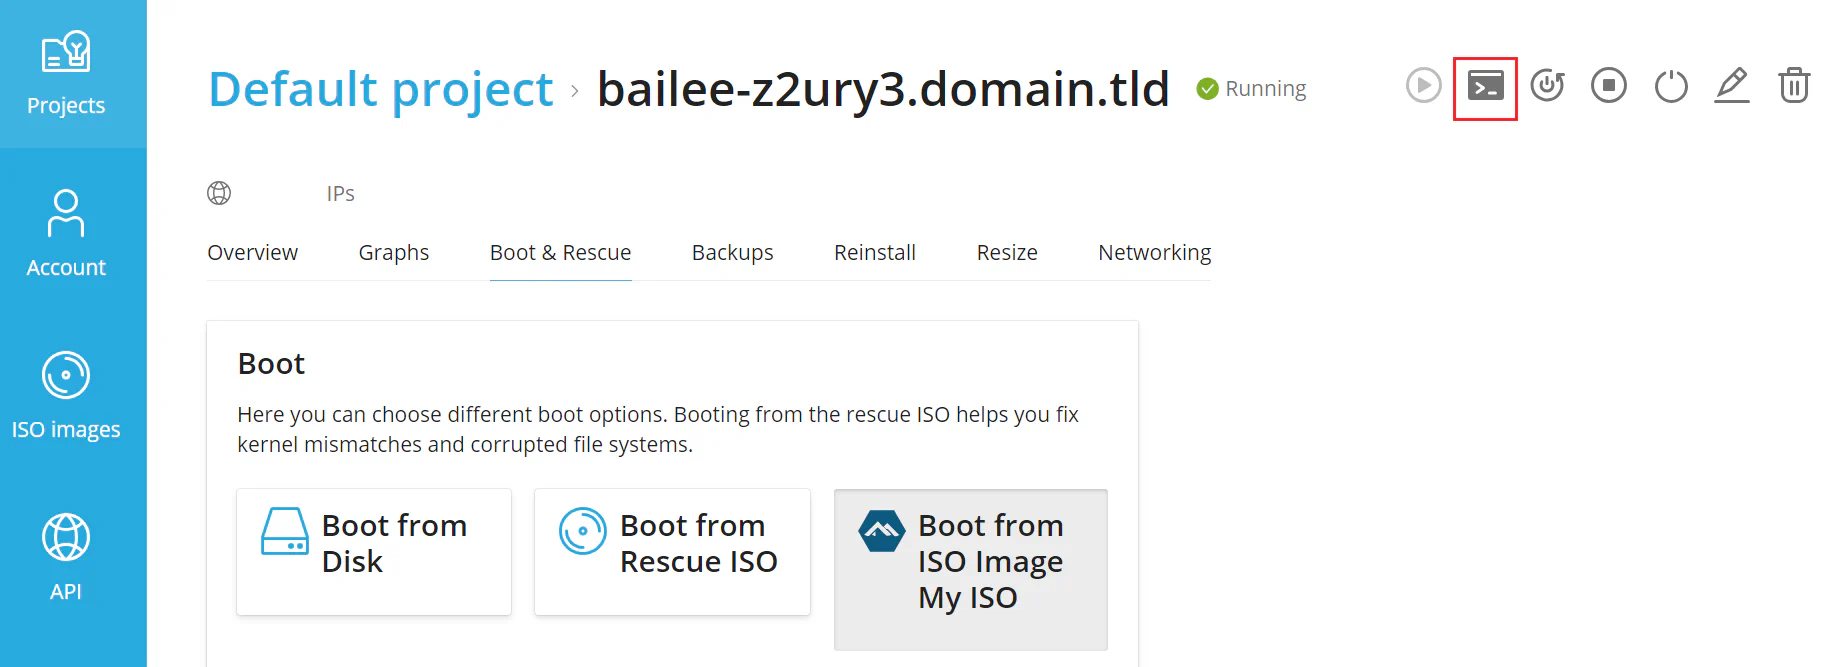
Click the name of the virtual server, and then go to the Boot & Rescue tab.
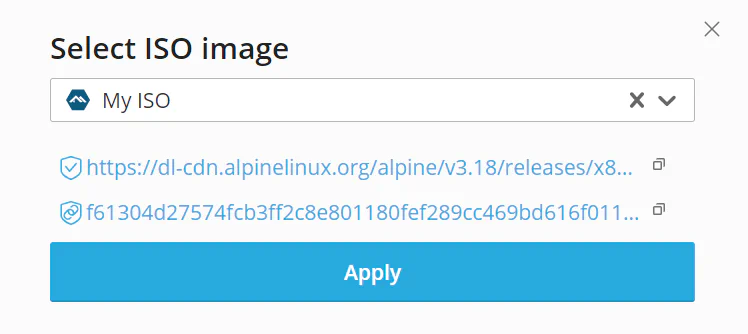
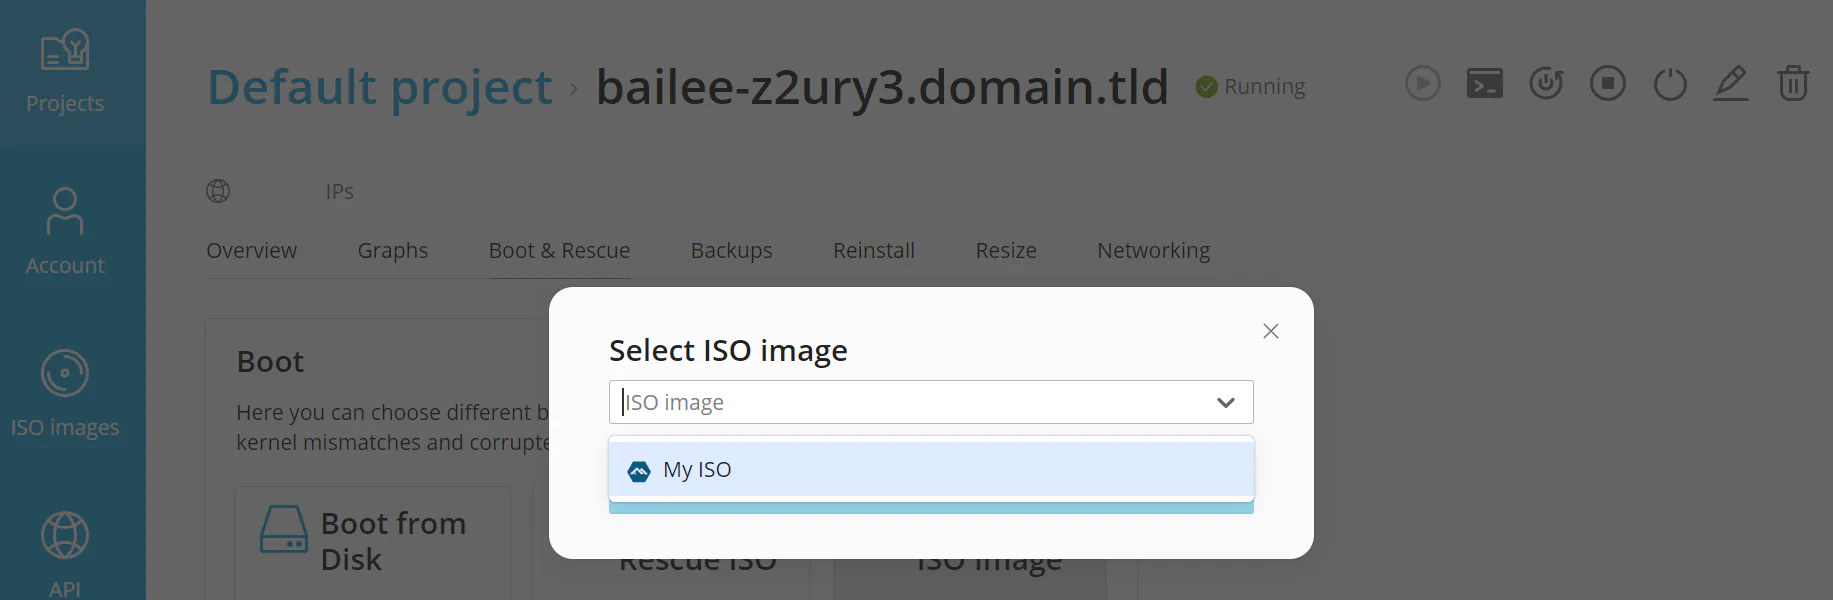
Click Boot from ISO Image, select the ISO image, and then click Apply.
Click Apply.
SolusVM shows you the server network settings you will need to configure later. You can copy and save them now, or return to them later. To proceed, click OK.
Click the
![]() icon to power off the server, and then click Yes, Power Off!.
icon to power off the server, and then click Yes, Power Off!.
Click the
![]() icon to start the server.
icon to start the server.
Click the
![]() icon.
icon.
You will see the installation screen of the operating system from the ISO image. Proceed with the steps of the OS installer.
At some point, you will need to configure the network settings. Use the information you copied in step 5, or go to the Networking tab of the server to copy the network settings.
Once the operating system installation is complete, the OS installer will ask you to restart the server. Before doing that, click Boot from Disk. SolusVM reminds you that you will need to install the guest tools and shows the required commands for popular operating systems. If you need them, copy the commands, and then click OK.
Restart the server. You can do so via the OS installer, or by using the
![]() and
and
![]() icons.
icons.
Log in to the server via SSH and install the guest tools. You can use the commands you copied earlier.
The server is set up and ready for use. The user can see that the operating system from the ISO image is now installed on the server.