Title here
Summary here
A virtual private cloud (VPC) is a secure and isolated private cloud infrastructure hosted within a public cloud. You can use a VPC to restrict public access to web services. For example, you can have a web service connect to its database service via a private network, but still be accessible from a public network. This way, a VPC creates an additional layer of security and control.
In SolusVM, you can configure a VPC for yourself as well as offer it to your users.
At the moment, the following limitations exist:
The VPC feature also has some aspects worth mentioning:
The usual process of providing a VPC for users’ virtual servers consists of the following steps:
We’ll break down each step in more detail below.
To create a VPC network:
Go to Compute Resources.
Choose a compute resource that will offer a VPC.
Note:
Make sure the compute resource is only related to one location. Otherwise, when necessary, SolusVM will pick the location with the highest ID.
Click the
![]() icon next to the compute resource of your choice.
icon next to the compute resource of your choice.
In the Network section, under IP for VPC network, specify a private IPv4 address which belongs to one of the following ranges:
10.0.0.0 – 10.255.255.255 (10.0.0.0/8 prefix)
172.16.0.0 – 172.31.255.255  (172.16.0.0/12 prefix)
192.168.0.0 – 192.168.255.255 (192.168.0.0/16 prefix) 
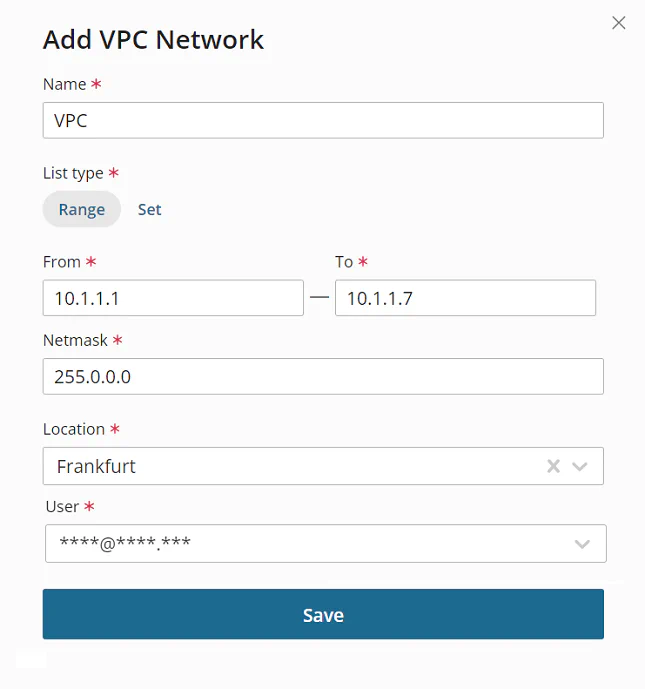
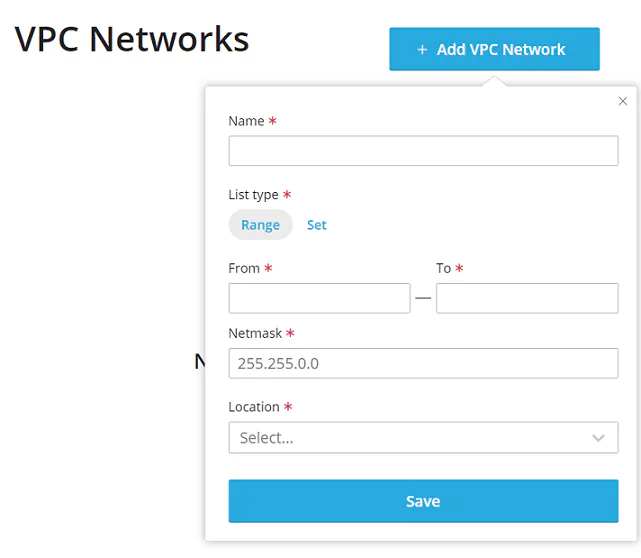
Go to Network > VPC Networks, and then click Create VPC Network.
Give your VPC network a recognizable name.
Choose the network’s list type. The type defines the way IP addresses will be assigned to the VPC network:
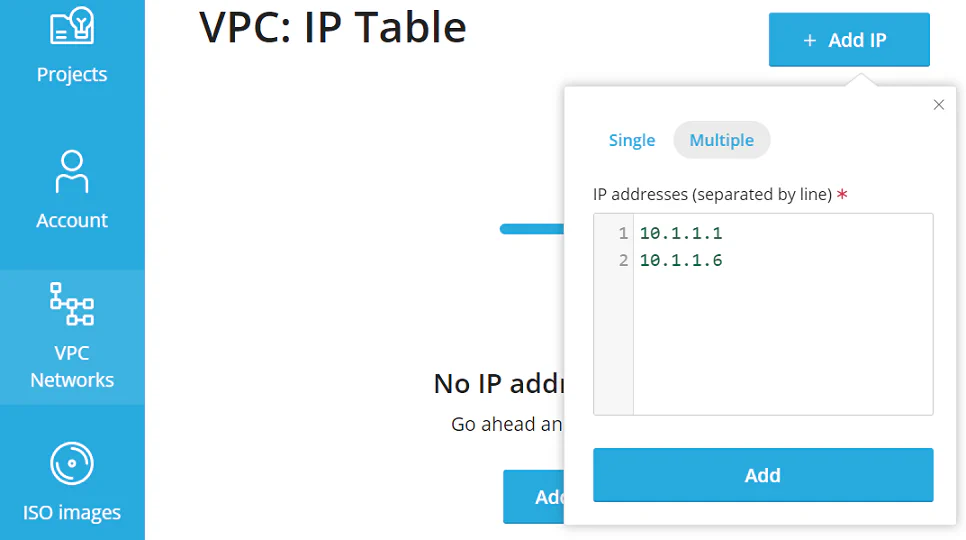
If you have selected Range in the previous step, specify a range of private IP addresses. If you have selected Set, there is no need to do that. Users will later add individual private IP addresses for this VPC network in the User Area.
Specify the IP addresses’ netmask.
Select the location of the VPC network.
Specify the email address of the network owner. You can create a VPC network for yourself or another user.
Click Save.
You have created a VPC network. If you have created it for yourself, the process is complete. If you have created it for another user, you need to make sure they have the required permissions.
The VPC feature introduces the following permissions:
Reserve the manage all VPC networks permission only for the Administrator role.
With the manage owned VPC networks permission, a user can create their own VPC network and also attach and detach virtual servers from it.
With the get VPC networks permission, a user can see VPC networks created and attached to their virtual servers by you. They can neither create their own VPC networks nor detach those created by you from their virtual servers.
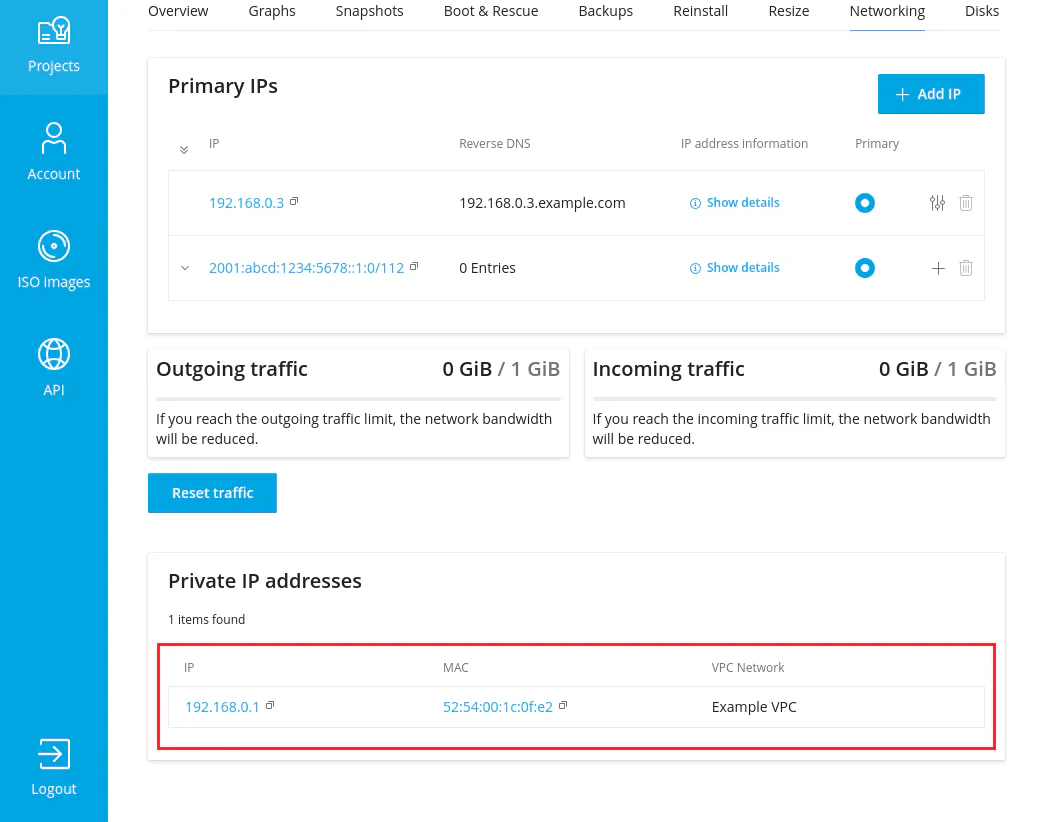
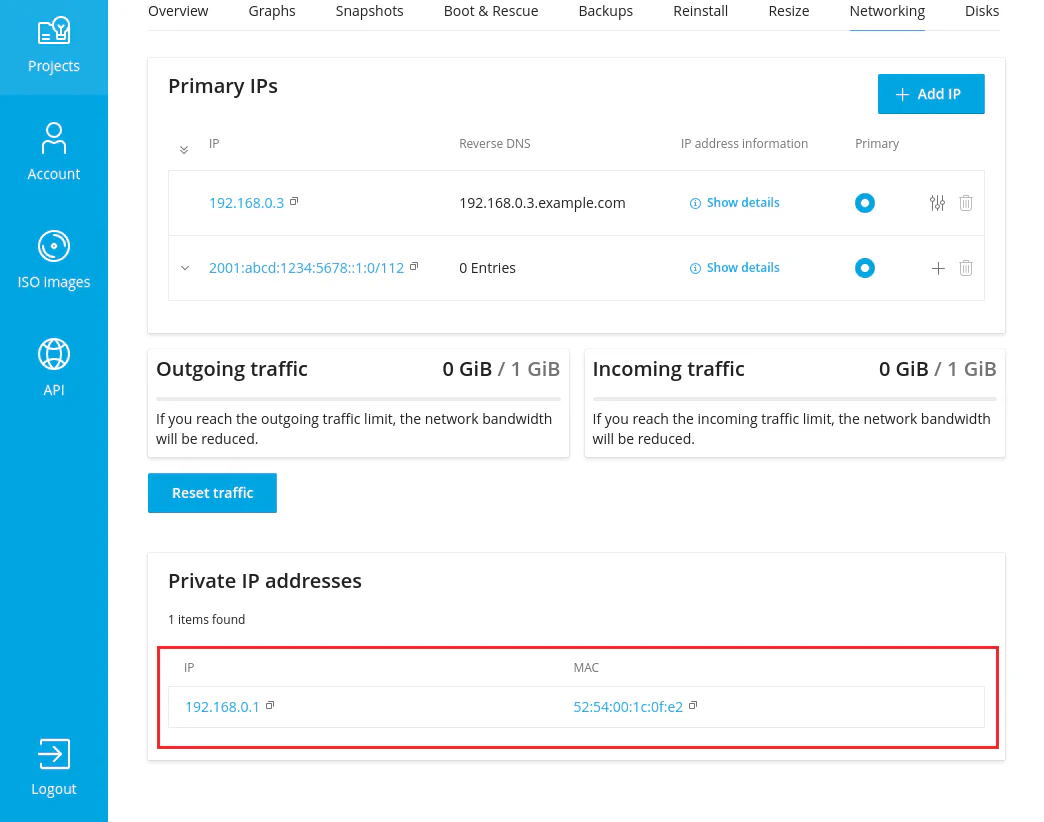
Without any VPC permissions granted, a user can still see private IP addresses from the VPC network but cannot see which VPC network has provided these IP addresses.
Usually, you choose to grant the manage owned VPC networks and get VPC networks permissions. The Client role does not have them enabled by default, and you cannot edit the role because it is built-in.
You will need to create a new role with a set of permissions related to a VPC, and then assign this role to one or more users.
To grant users the permissions to use the VPC network:
Go to Access > Roles, and then click Add Role.
Give the role a recognizable name.
Select the manage owned VPC networks and get VPC networks permissions.
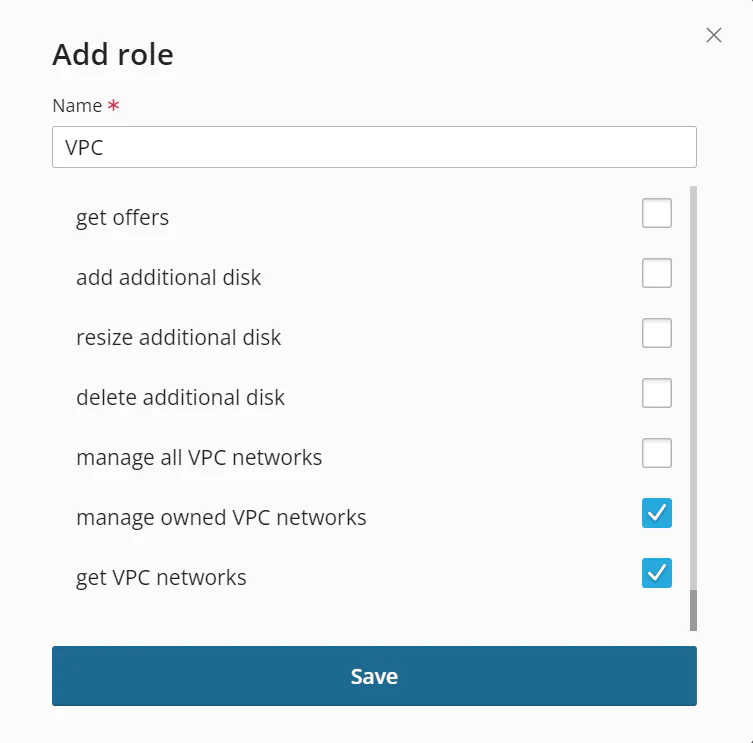
Click Save.
Go to Access > Users.
Click the
![]() icon next to the user you want to grant the new role to.
icon next to the user you want to grant the new role to.
Under Role, keep the default client role, and then select the new role you have created.
Click Save.
The user now has the necessary permissions.
Learn more about creating and using roles and permissions.
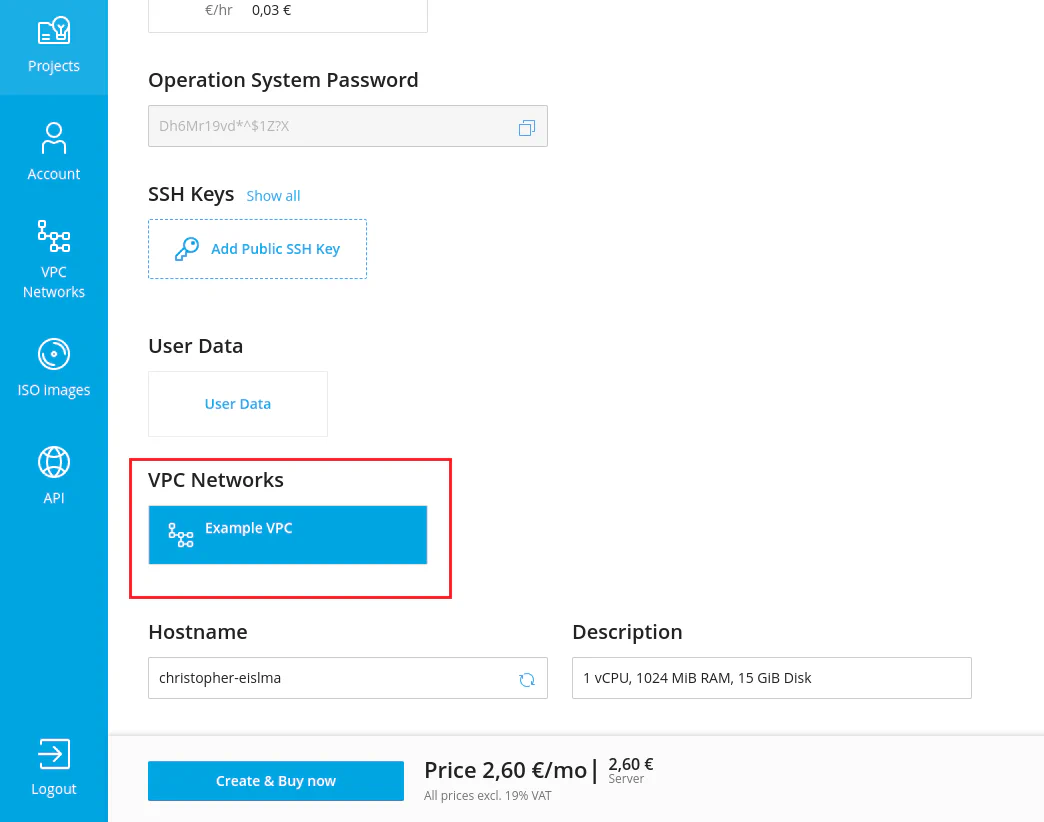
If you have granted the manage owned VPC networks and get VPC networks permissions, users can attach and detach their virtual servers from the VPC. They can do so while editing existing servers.
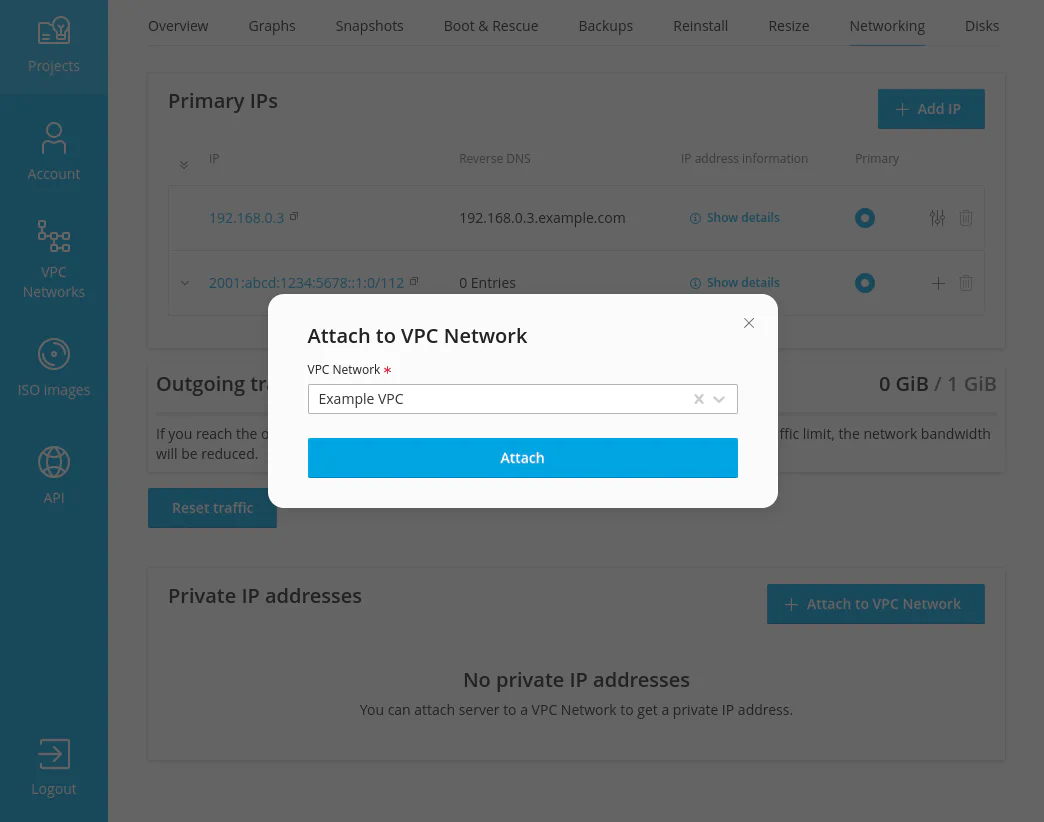
They can also attach a new server to the VPC when they create the server.