You can create a SolusVM product in WHMCS to provision virtual servers for customers. Before creating a product, you need a product group to organize your offerings.
If you already have a product group, skip this section and proceed to
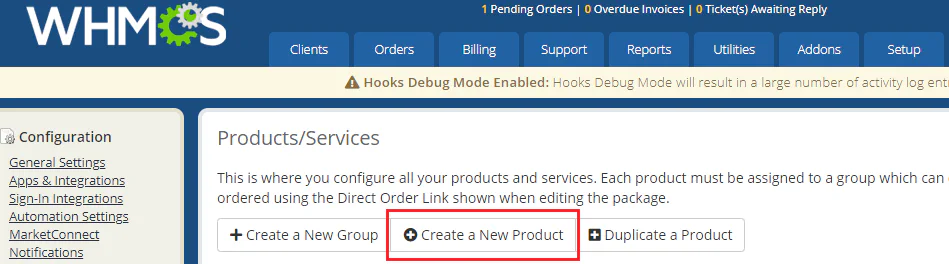
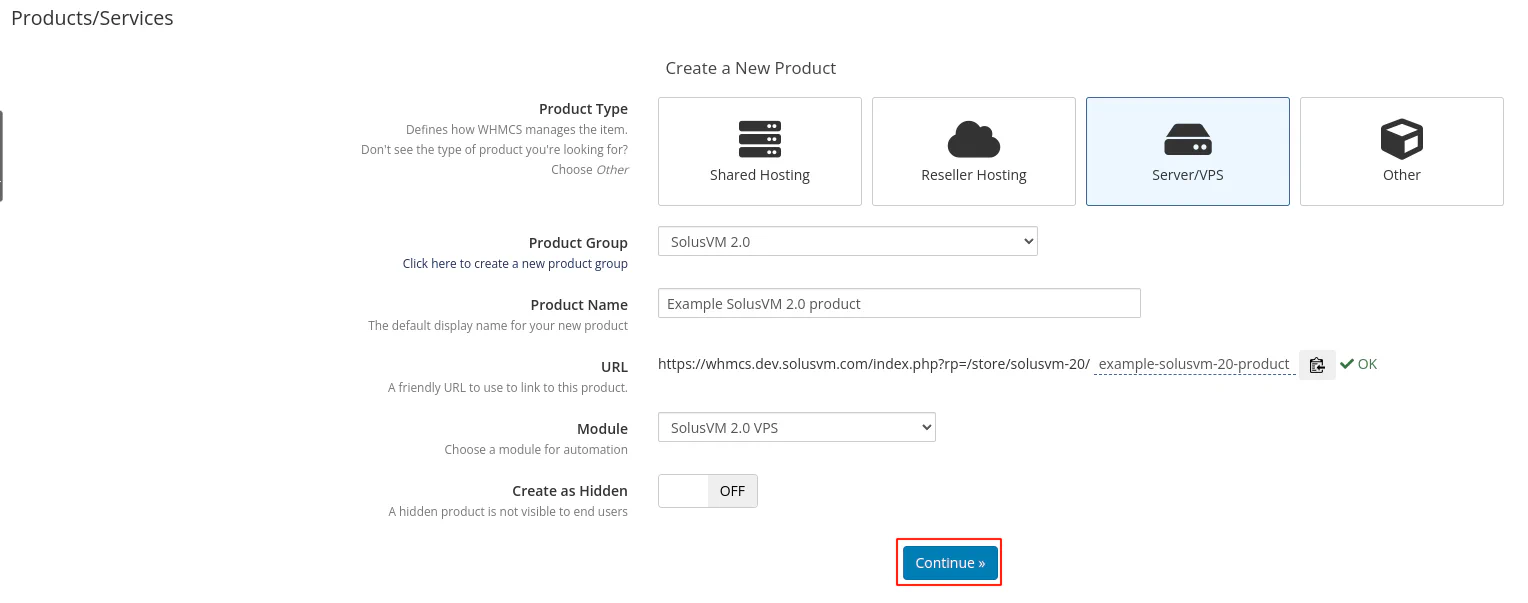
Create a product.
To create a product group:
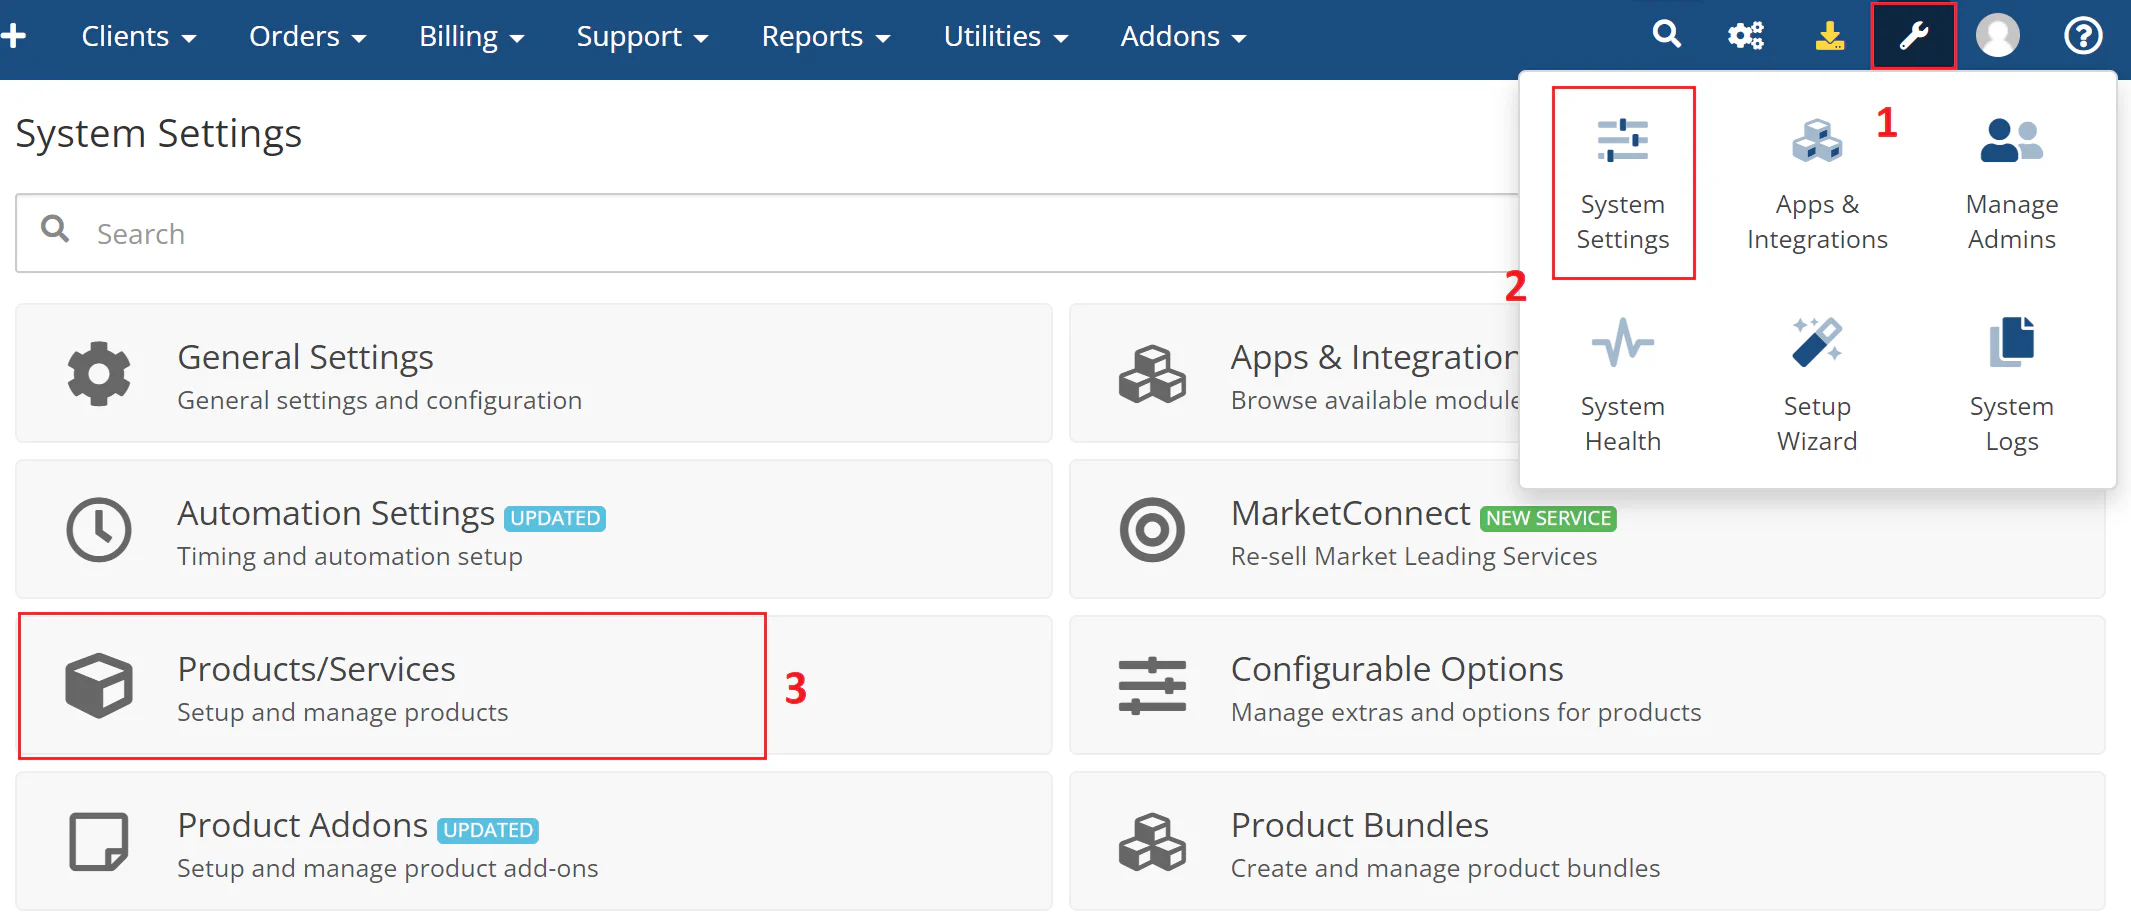
Navigate to System Settings > Products/Services.
The following image shows the System Settings menu:
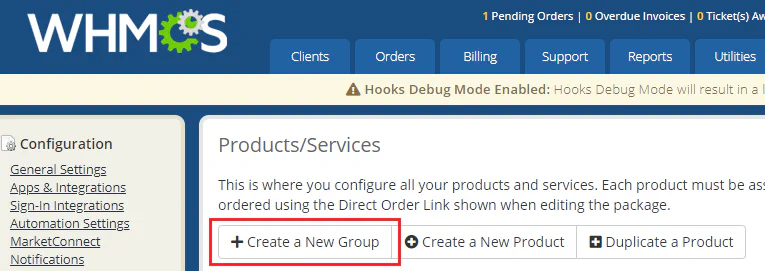
Click Create a New Group.
The following image shows the Create a New Group button:
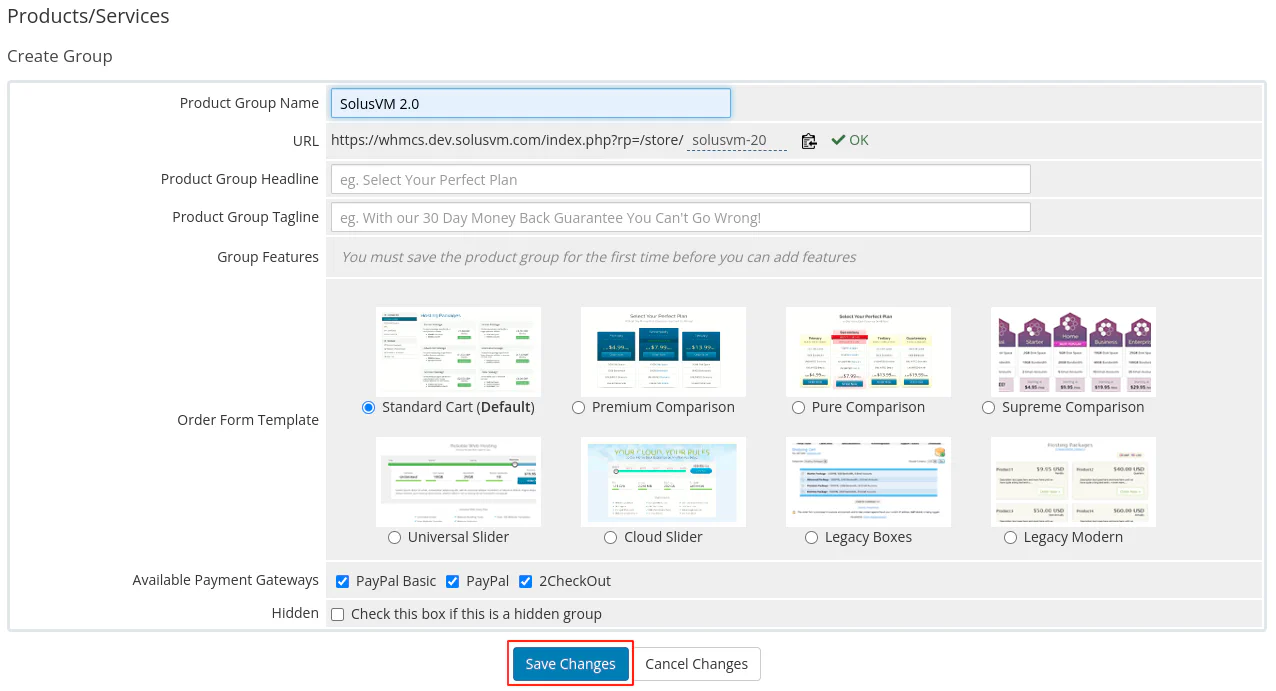
Enter the group settings and then click Save Changes. Configure the following settings:
Enter the product group name. This name displays to you and your customers.
Select the order form template. This defines the design customers see when they place an order.
Keep the PayPal Basic checkbox selected.
Note:
There are other optional settings you can specify. <a href="https://docs.whmcs.com/Product_Groups" target="_blank">Learn more about product group optional settings</a>.
The following image shows the product group settings:
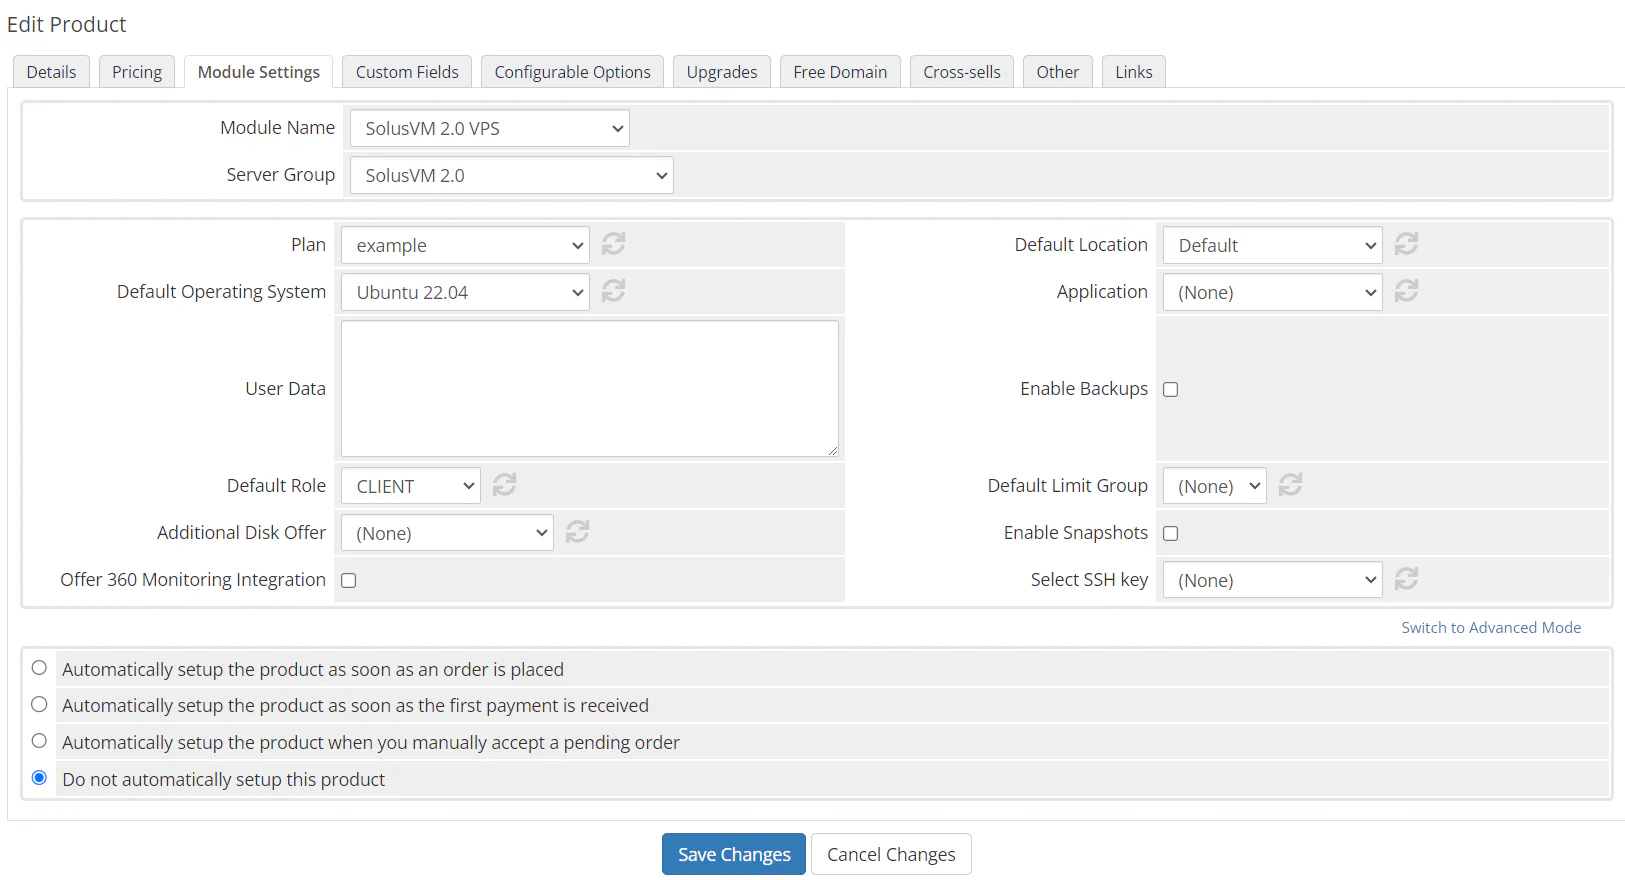
User Data (optional) — Cloud-init preconfiguration for virtual servers created from the product. For example, you can create additional users or user groups in the system, run the desired commands at the first boot, and so on. For reference, see cloud config examples.
Default Role — Select
the necessary SolusVM role for client accounts created during provisioning of this product.
Enable Backups — Enable or disable backup creation and restoration in the WHMCS client area for virtual servers created through the product. For this option to work, you need to enable backups in the SolusVM plan selected in the Plan option.
Enable Snapshots — Enable or disable snapshot creation and reverting in the WHMCS client area for virtual servers created through the product. For this option to work, you need to enable snapshots in the SolusVM plan selected in the Plan option.
Select SSH key — Select SSH key that will be installed in a virtual server created from the product, for example, to allow your technical support engineer to get access to the server. You need to add the SSH key in SolusVM’s SSH Keys interface (SolusVM » Access » SSH Keys).
Setup Options — Select how and when WHMCS will set up the product once customers order it. We recommend that you keep the Do not automatically setup this product option. Learn more about other options in the WHMCS documentation, the “Module Settings” section.
At this point, customers can create SolusVM servers in WHMCS with the plan, location, and operating system that you selected. To give customers the ability to select server settings,
create corresponding configurable options.
You can also configure
upgrade and downgrade of a product using the same configurable options.